Blooming Gel Nail Art Turns Tips Into Trippy, One-of-a-Kind Masterpieces

Introduction
Blooming Gel Nail Art is a captivating technique that uses a clear gel polish known as Blooming Gel to create stunning, watercolor-like effects on nails. This innovative approach sets itself apart from traditional nail art methods by offering a natural and flowy application of colors, resulting in truly mesmerizing designs that stand out. The unique characteristic of Blooming Gel Nail Art is its ability to create trippy, one-of-a-kind masterpieces that resemble the work of talented artists.
In recent years, the popularity of Blooming Gel Nail Art has surged within the nail art industry, captivating the attention of both nail technicians and enthusiasts. This trend’s rise can be attributed to its ability to unleash creativity and transform nails into captivating canvases for self-expression. As more individuals seek distinctive and unconventional ways to adorn their nails, Blooming Gel Nail Art has emerged as a frontrunner in providing an avenue for unique and personalized nail designs.
What is Blooming Gel Nail Art?
Blooming Gel Nail Art is a unique and innovative technique that has been revolutionizing the nail art industry. Unlike traditional nail art methods, Blooming Gel Nail Art offers a mesmerizing blooming effect, reminiscent of watercolor paintings, on the nails. This technique allows for the creation of stunning and intricate designs with an effortless flow of colors, providing endless possibilities for creativity and self-expression.
Key Elements of Blooming Gel Nail Art
The distinguishing feature of Blooming Gel Nail Art lies in the use of a special clear gel polish known as Blooming Gel. This type of gel polish has a unique formula that enables it to spread and blur secondary colors effortlessly, creating a soft, ethereal effect on the nails. As the Blooming Gel interacts with other gel polishes, it creates a captivating blooming effect that adds depth and dimension to the designs.
Setting It Apart from Traditional Techniques
Blooming Gel Nail Art sets itself apart from traditional nail art techniques through its fluidity and seamless blending of colors. Unlike conventional methods that rely on precise brush strokes or intricate detailing, Blooming Gel Nail Art embraces a more organic and free-flowing approach, allowing artists to achieve dreamy, watercolor-like patterns with ease. This innovative technique opens up new avenues for nail artists to explore abstract designs, natural textures, and whimsical motifs that were previously challenging to replicate using traditional methods.
In essence, Blooming Gel Nail Art represents a departure from conventional nail art practices, offering a fresh perspective on design possibilities and elevating the artistry of nail enthusiasts worldwide.
The Application Process
When it comes to creating stunning nail art with Blooming Gel, the application process plays a crucial role in achieving long-lasting, vibrant designs. Let’s walk through the step-by-step guide on how to apply Blooming Gel Nail Art, from prepping the nails to adding intricate designs and ensuring durability.
1. Prepping the Nails
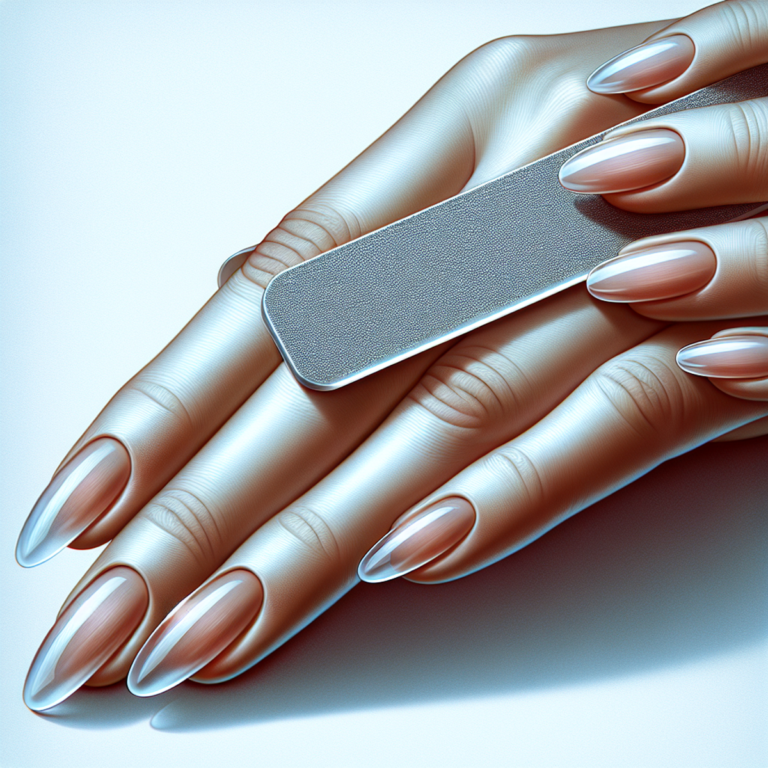
Before starting any nail art application, it’s essential to prep the nails to ensure a smooth and clean canvas for your designs. This includes shaping the nails, pushing back the cuticles, and gently buffing the nail surface to remove any natural oils.
2. Base Color
After prepping the nails, apply a base color of your choice. This will serve as the background for your Blooming Gel design and will influence the overall look of your nail art. Ensure that the base color is fully dry before proceeding to the next step.
3. Gel Nail Polish
Once the base color is dry, apply a layer of clear gel polish over the entire nail. This will act as the foundation for the Blooming Gel technique and provide a smooth surface for creating intricate designs.
4. Blooming Gel
Here comes the star of the show – Blooming Gel! Using a fine brush or dotting tool, apply the Blooming Gel in desired patterns or shapes on top of the clear gel polish. The unique flowing nature of Blooming Gel allows you to create mesmerizing designs with ease.
5. Secondary Colors
After applying Blooming Gel, it’s time to introduce secondary colors to bring your design to life. Use a contrasting or complementary gel polish to add details, swirls, or accents to enhance the blooming effect.
6. Top Coat
To ensure durability and shine, it’s crucial to finish off your Blooming Gel Nail Art with a protective top coat. This not only seals in your design but also adds a glossy finish that will make your nail art stand out.
Each step in this process is vital in achieving a successful manicure that lasts. By following these techniques and paying attention to detail during each stage of application, you can create captivating Blooming Gel designs that are sure to turn heads.
Remember, practice makes perfect when it comes to mastering this unique nail art technique!
Versatile Designs with Blooming Gel Nail Art
Blooming Gel Nail Art offers endless possibilities for creating unique and attention-grabbing nail designs. The gel polish flows smoothly, allowing you to achieve mesmerizing effects that imitate various textures and patterns. Here are some versatile designs that you can create using the Blooming Gel technique:
1. Marble and Natural Stone Designs
Marble and natural stone designs are loved in the world of nail art for their classy and sophisticated appearance. With Blooming Gel Nail Art, you can create realistic marble and stone effects that will impress everyone. Here’s how:
- Apply a light base color of your choice.
- Once the base color dries, apply a layer of Blooming Gel over it.
- Use a fine brush or dotting tool to draw thin lines in a secondary color (like gray or black) on the nail, creating veins.
- For a more authentic marble look, lightly drag a toothpick or thin brush through the veins to create a marbled texture.
- Repeat these steps on all nails, then finish off with a top coat for added shine.
By combining different shades and employing veining techniques, you can achieve stunning marble and natural stone designs that turn your nails into miniature pieces of art.
2. Watercolor and Floral Prints
Blooming Gel Nail Art has a special ability to produce delicate watercolor washes on the nails. This technique is perfect for achieving soft and dreamy floral prints. Here’s how to create this ethereal look:
- Apply a light base color to your nails.
- Once dry, apply a layer of Blooming Gel over the base color.
- Choose two or three secondary colors in pastel shades.
- Use a small brush or dotting tool to add dots or strokes of the secondary colors onto the nails.
- While the gel is still wet, dip a brush in rubbing alcohol and blend the colors together to create a watercolor effect.
- To incorporate floral prints, use a fine brush or dotting tool to make flower shapes with the secondary colors.
- Seal the design with a top coat for a glossy finish.
The Blooming Gel technique allows colors to blend seamlessly, resulting in nails that appear soft and romantic — perfect for any occasion.
3. Tie-Dye and Gradients
Tie-dye designs and gradients involve blending colors smoothly. With Blooming Gel Nail Art, you can achieve vibrant tie-dye looks and seamless color transitions on your nails. Here’s how:
- Apply a light base color to your nails.
- Once dry, apply a layer of Blooming Gel over the base color.
- Choose two or three secondary colors in contrasting shades.
- Use a small brush or dotting tool to apply dots or strokes of the secondary colors onto the nails.
- While the gel is still wet, dip a brush in rubbing alcohol and blend the colors together to create a tie-dye effect or gradient.
- Repeat these steps on all nails, then finish off with a top coat for added shine.
With Blooming Gel Nail Art, you can play around with different color combinations and techniques to create unique tie-dye and gradient designs that will make your nails stand out.
4. Animal Prints and Other Patterns
Animal prints never go out of style in the world of nail art. With Blooming Gel Nail Art, you can effortlessly recreate the spots and stripes of animals or craft intricate geometric patterns. Here’s how:
- Apply a light base color to your nails.
- Once dry, apply a layer of Blooming Gel over the base color.
- Choose one or two secondary colors that contrast with the base color.
- Use a small brush or dotting tool to create spots, stripes, or other patterns on the nails with the secondary colors.
- For added depth and dimension, consider layering different shades of the secondary colors.
- Finish off with a top coat for a glossy look.
The versatility of Blooming Gel allows you to unleash your creativity with animal prints and other patterns, turning your nails into a canvas for unique and eye-catching designs.
With these versatile designs, you can transform your nails into one-of-a-kind masterpieces using the Blooming Gel Nail Art technique. Let your creativity flow and experiment with different colors, techniques, and patterns to create nail art that truly reflects your personal style.
2. Watercolor and Floral Prints
Blooming Gel Nail Art offers a unique canvas for delicate watercolor washes and intricate floral patterns. The flowy nature of the Blooming Gel technique allows for seamless blending and soft, dreamy designs.
Techniques for Achieving Watercolor Washes
To create watercolor-inspired nail art with Blooming Gel, consider the following techniques:
- Start with a light base color to mimic the soft background of a watercolor painting.
- Apply the Blooming Gel in thin layers to achieve a translucent effect, resembling the ethereal quality of watercolors.
- Use a fine brush or detail tool to blend different shades of gel polish, creating a gradient effect reminiscent of watercolor pigments merging on paper.
- Experiment with gentle brushstrokes and subtle layering to capture the organic, fluid essence of watercolor art.
- Draw inspiration from various mediums such as fabric painting or Christmas card designs, incorporating their techniques into your nail artistry.
Incorporating Floral Patterns
Floral prints can be elegantly incorporated into Blooming Gel Nail Art by following these tips:
- Choose complementary colors to represent various floral elements such as petals, leaves, and stems.
- Use the flowy nature of Blooming Gel to create soft, abstract floral designs that mimic the natural movement of flowers swaying in the breeze.
- Experiment with different floral motifs, from dainty wildflowers to bold tropical blooms, to showcase the versatility of the Blooming Gel technique.
- Consider adding delicate accents such as tiny buds or vines to enhance the overall floral composition on each nail.
By mastering these techniques and embracing your creativity, you can achieve captivating watercolor-inspired nail art and elegant floral prints using Blooming Gel—a testament to its versatility in bringing artistic visions to life on your fingertips.
3. Tie-Dye and Gradients
The Blooming Gel Nail Art technique is not only perfect for creating delicate watercolor washes and incorporating floral patterns, but it also allows you to achieve vibrant tie-dye looks and seamless color gradients. By carefully applying Blooming Gel, you can create stunning designs that are reminiscent of the psychedelic patterns of the 60s and 70s. Here are some methods to help you achieve these eye-catching styles:
Tie-Dye Designs
Tie-dye is a popular trend that never goes out of style. With Blooming Gel Nail Art, you can recreate this groovy look on your nails. Here’s how:
- Start by applying a base color of your choice using regular gel polish.
- Once the base color is dry, apply a layer of Blooming Gel over the entire nail.
- Using a thin brush or a dotting tool, drop different colors of gel polish randomly onto the nail.
- Gently swirl the colors together with the brush or tool to create a marbled effect.
- Cure the design under a UV or LED lamp.
- Finish off with a top coat to seal in the design and add shine.
If you want more inspiration on creating tie-dye effects, you can check out this video tutorial which demonstrates how to do ombre or gradient tie-dyeing.
Gradients
Gradients are a versatile and visually appealing design option that can be achieved using Blooming Gel Nail Art. Here’s how you can create seamless color transitions:
- Apply a base color onto the nail.
- Apply Blooming Gel over the entire nail, making sure to cover the base color completely.
- Choose two or more secondary colors that complement each other well.
- Using a thin brush or dotting tool, drop one of the secondary colors onto one side of the nail.
- Repeat with another secondary color on the opposite side of the nail.
- Gently blend the colors together in the center using a clean brush or tool, creating a gradient effect.
- Cure the design under a UV or LED lamp.
- Apply a top coat to protect the design and add shine.
To further enhance your skills in creating gradients, you can also check out this YouTube channel which provides helpful tutorials on various nail art techniques.
These techniques allow you to explore different categories of designs that can be achieved with Blooming Gel Nail Art. Experiment with various color combinations and patterns to create unique tie-dye looks and gradients. Remember to cure each layer of gel polish properly and apply a protective top coat for long-lasting results.
4. Animal Prints and Other Patterns
Blooming Gel Nail Art offers a versatile canvas for creating intricate animal prints and various geometric patterns. The flowy nature of blooming gel allows for the mimicry of animal spots, stripes, and geometric shapes with ease. Here are some tips for achieving stunning animal prints and patterns using the versatility of Blooming Gel:
- Leopard Prints: Create leopard prints by using a combination of black and brown Blooming Gel to form the distinctive spots. Start with a light base color and add the spots with a fine nail art brush, allowing the Blooming Gel to naturally spread for a realistic effect.
- Zebra Stripes: Achieve classic zebra stripes by using black and white Blooming Gel. Apply the base color and then use the Blooming Gel to draw thin, parallel lines that evoke the striking pattern of a zebra’s coat.
- Geometric Patterns: Experiment with geometric designs such as chevrons, triangles, or abstract shapes by layering different colors of Blooming Gel. The fluidity of the gel makes it easy to create sharp lines and precise shapes for a modern, edgy look.
By leveraging the unique properties of Blooming Gel, nail artists can unleash their creativity to produce captivating animal prints and dynamic geometric patterns that stand out.
Long-lasting Results and Easy Removal
Blooming Gel Nail Art offers not only stunning visual effects but also long-lasting results when done correctly. The choice of high-quality products, such as TGB Blooming Gel, can significantly contribute to the endurance of the nail art. The special formulation of TGB Blooming Gel ensures that your intricate designs will remain vibrant and intact for an extended period, typically lasting up to four weeks without losing their allure.
When it comes time to remove your Blooming Gel designs, it’s essential to do so carefully to avoid causing damage to your nails. The simple removal process involves soaking the nails in acetone for a sufficient amount of time, allowing the gel to gently lift off without the need for excessive scraping or harsh techniques. This gentle removal method helps maintain the health and strength of your natural nails, ensuring they remain in optimal condition even after enjoying a mesmerizing Blooming Gel manicure.
To ensure successful removal without compromising your nail health, consider the following tips:
- Use High-Quality Acetone: Opt for high-quality acetone specifically designed for gel nail polish removal. This ensures a more efficient process with minimal exposure to harsh chemicals.
- Wrap Soaked Cotton Pads: After saturating cotton pads with acetone, securely wrap them around each nail using aluminum foil. This wrapping technique helps concentrate the acetone’s dissolving power on the gel polish while preventing evaporation.
- Be Patient: Allow sufficient time for the acetone-soaked cotton pads to work their magic. Depending on the specific gel polish used and its thickness, this may take anywhere from 10 to 30 minutes.
By following these simple yet crucial steps, you can effortlessly remove your Blooming Gel designs without compromising the health and integrity of your nails. This easy removal process adds further appeal to the already captivating experience of adorning your nails with unique and vibrant Blooming Gel Nail Art designs.
Embrace Your Creativity with Blooming Gel Nail Art
The beauty of Blooming Gel Nail Art is that it allows you to be creative and show your unique style through designs and colors. This technique gives you the freedom to try new things and make special nail looks. Here are some ideas to inspire your creative journey:
1. Experiment with Unique Designs
Let your imagination run wild and try out different design ideas. You can go for abstract patterns, detailed motifs, or anything else that catches your fancy. Take inspiration from nature, art, fashion, or your hobbies. Blooming Gel Nail Art gives you the chance to bring these inspirations to life on your nails.
2. Play with Color Combinations
Blooming Gel is perfect for blending colors smoothly. You can mix bright shades together, use soft pastels, or even try contrasting hues for a bold look. Another option is creating an ombre effect by layering different colors. The possibilities for color combinations are endless with Blooming Gel.
To help you get started, here’s an idea for a design: “Galaxy Dreams”.
- Start with a dark base color like midnight blue or black.
- Apply Blooming Gel over it in a swirling pattern using a thin brush or dotting tool.
- Add secondary colors like purple, pink, and silver in random spots for the galaxy effect.
- Finish off with glitter accents for a touch of stardust.
Let your nails transport you to a cosmic wonderland.
The most important thing about embracing your creativity with Blooming Gel Nail Art is to enjoy yourself and let your true self shine through. There are no boundaries or rules when it comes to expressing yourself through nail art. So go ahead, have fun, and transform your nails into stunning pieces of art!
The Future of Nail Art: Pushing Boundaries with Innovative Techniques
The world of nail art is always changing, with new techniques and trends appearing all the time. One technique that’s making waves and allowing artists to explore their creativity like never before is Blooming Gel Nail Art.
Unleashing Creativity with Blooming Gel Nail Art
Blooming Gel Nail Art is a game-changer in the industry, offering artists an easy way to create stunning designs that truly stand out. Here’s why it’s becoming a favorite among nail art enthusiasts:
- Ease of Use: Unlike other intricate nail art techniques that require advanced skills, Blooming Gel is beginner-friendly. Its fluid consistency makes it simple to work with, even for those who are new to nail art.
- Versatility: Whether you prefer delicate patterns or bold statements, Blooming Gel can do it all. Its ability to spread and blend effortlessly on the nails allows for endless design possibilities.
- Time Efficiency: Creating intricate nail art can be time-consuming, but Blooming Gel speeds up the process. With just a few brush strokes, you can achieve a mesmerizing design that looks like it took hours to create.
The Evolution of Nail Art: What Makes Blooming Gel Different?
What sets Blooming Gel Nail Art apart from traditional techniques? It’s all about its unique properties:
- Self-Spreading Formula: Unlike regular nail polish or gel polish that stays in place once applied, Blooming Gel has a self-spreading formula. This means that when you apply it on the nails, it naturally expands and creates beautiful organic patterns.
- Watercolor Effect: Another distinctive feature of Blooming Gel is its watercolor-like effect. As it spreads on the nails, it creates soft edges and blends seamlessly with other colors, resulting in a dreamy and artistic look.
- Sheer Finish: Blooming Gel has a sheer finish, allowing you to layer multiple colors without them becoming too opaque. This transparency adds depth and dimension to your designs, making them visually captivating.
The Future of Nail Art: Where Blooming Gel is Taking Us
Blooming Gel Nail Art has opened up a whole new world of possibilities in nail art, and it’s only going to continue to grow in popularity. As more artists experiment with this technique and share their creations on social media, we can expect to see even more innovative designs and techniques in the future.
Some of the ways that Blooming Gel Nail Art is pushing the boundaries include:
- New Design Possibilities: The flowy nature of Blooming Gel allows for the creation of intricate designs that were previously difficult to achieve. From abstract patterns to intricate floral prints, artists are exploring new design possibilities that were once unimaginable.
- Combining Techniques: Nail artists are not limited to using just Blooming Gel. They are incorporating other techniques such as stamping, foiling, and hand-painted details to create multidimensional and eye-catching designs.
- Experimenting with Color: Blooming Gel Nail Art offers a unique opportunity to play with different color combinations. Artists are exploring bold and unconventional color choices, creating striking contrast and unexpected harmonies.
- Texture and Dimension: With Blooming Gel, artists can create depth and texture on the nails. By layering multiple colors and using different brush strokes, they can achieve a three-dimensional effect that adds an extra element of interest to their designs.
As we look ahead, it’s clear that Blooming Gel Nail Art is just the beginning of a wave of innovative techniques in the nail art industry. The possibilities for self-expression on our fingertips are endless, and with each passing day, artists are pushing the boundaries even further.
So, if you’re ready to take your nail art to the next level and become a trendsetter yourself, don’t hesitate to embrace Blooming Gel Nail Art. Let your creativity bloom and turn your tips into one-of-a-kind masterpieces that will leave everyone in awe.
Conclusion
The beautiful effects of Blooming Gel Nail Art are truly captivating. This unique technique allows you to create stunning designs on your nails, making them look like incredible pieces of art. By using this form of self-expression, you can show off your creativity and stand out from everyone else.
Blooming Gel Nail Art offers so many options for you to try out different styles and looks. Whether you prefer the natural look of marble and stone, the softness of watercolors with flowers, the boldness of tie-dye, or the edginess of animal prints and geometric shapes, Blooming Gel has it all.
Not only does Blooming Gel Nail Art look amazing, but it also lasts a long time. Using high-quality products like TGB Blooming Gel can keep your nail art looking fresh for up to four weeks. And when you want to change it up, removing it is easy. Just soak your nails in acetone, and you’re ready for a new design.
So why not give Blooming Gel Nail Art a try? Let yourself be creative as you play around with different colors, techniques, and designs. With Blooming Gel, you can transform your nails into stunning pieces of art that show off who you are.
Embrace this innovative technique and unleash your creativity. Turn your nails into amazing works of art with Blooming Gel Nail Art. The possibilities are endless!
