Beauty Lesson: Highlighting and Contouring
Introduction
Highlighting and contouring are makeup techniques that have gained immense popularity in recent years. These techniques involve strategically applying products to sculpt and define the face, creating a stunning transformation. By playing with light and shadow, highlighting and contouring can enhance your natural features, add depth and dimension, and create a flawless finish.
Highlighting is all about bringing certain areas of the face forward, while contouring involves creating shadows to accentuate specific facial features. These techniques can be achieved using a variety of products such as powders, creams, or sticks. The key to achieving natural-looking results lies in seamlessly blending these products for a cohesive makeup look.
In this article, we will dive deep into the art of highlighting and contouring. We will explore everything from understanding the different products used to mastering the application techniques. Whether you’re a beginner or an experienced makeup enthusiast, this guide will equip you with the knowledge and skills needed to create a luminous and sculpted appearance.
Understanding Highlighting and Contouring Products
Highlighting and contouring are powerful techniques that can transform your face by playing with light and shadow, creating depth and dimension. To achieve a flawless finish, it’s essential to understand the products used in highlighting and contouring, as well as how to choose the right shade of highlighter for your skin tone. Let’s dive into the world of highlighters and explore the different options available.
Choosing the Right Shade of Highlighter for Your Skin Tone
When it comes to highlighter shades, there are a few key factors to consider. The right shade will complement your skin tone and enhance your natural features. Here’s a guide to selecting the perfect highlighter shade for fair, medium, and deep skin tones:
Fair Skin
If you have fair skin, opt for highlighters with a pearl or champagne undertone. These shades will add a subtle glow without overpowering your complexion. Avoid highlighters that are too dark or too warm, as they can appear unnatural on fair skin.
Medium Skin
For those with medium skin tones, golden or peachy highlighters work best. These shades add warmth and radiance to the skin without looking too stark. Avoid highlighters that are too light or cool-toned, as they can make your complexion appear washed out.
Deep Skin
If you have deep skin, go for highlighters with bronze or copper undertones. These shades will beautifully complement your complexion and create a stunning glow. Steer clear of highlighters that are too light or ashy, as they can appear chalky on deeper skin tones.
Remember to swatch different shades on your skin before making a final decision. The right highlighter should blend seamlessly into your complexion and enhance your natural beauty.
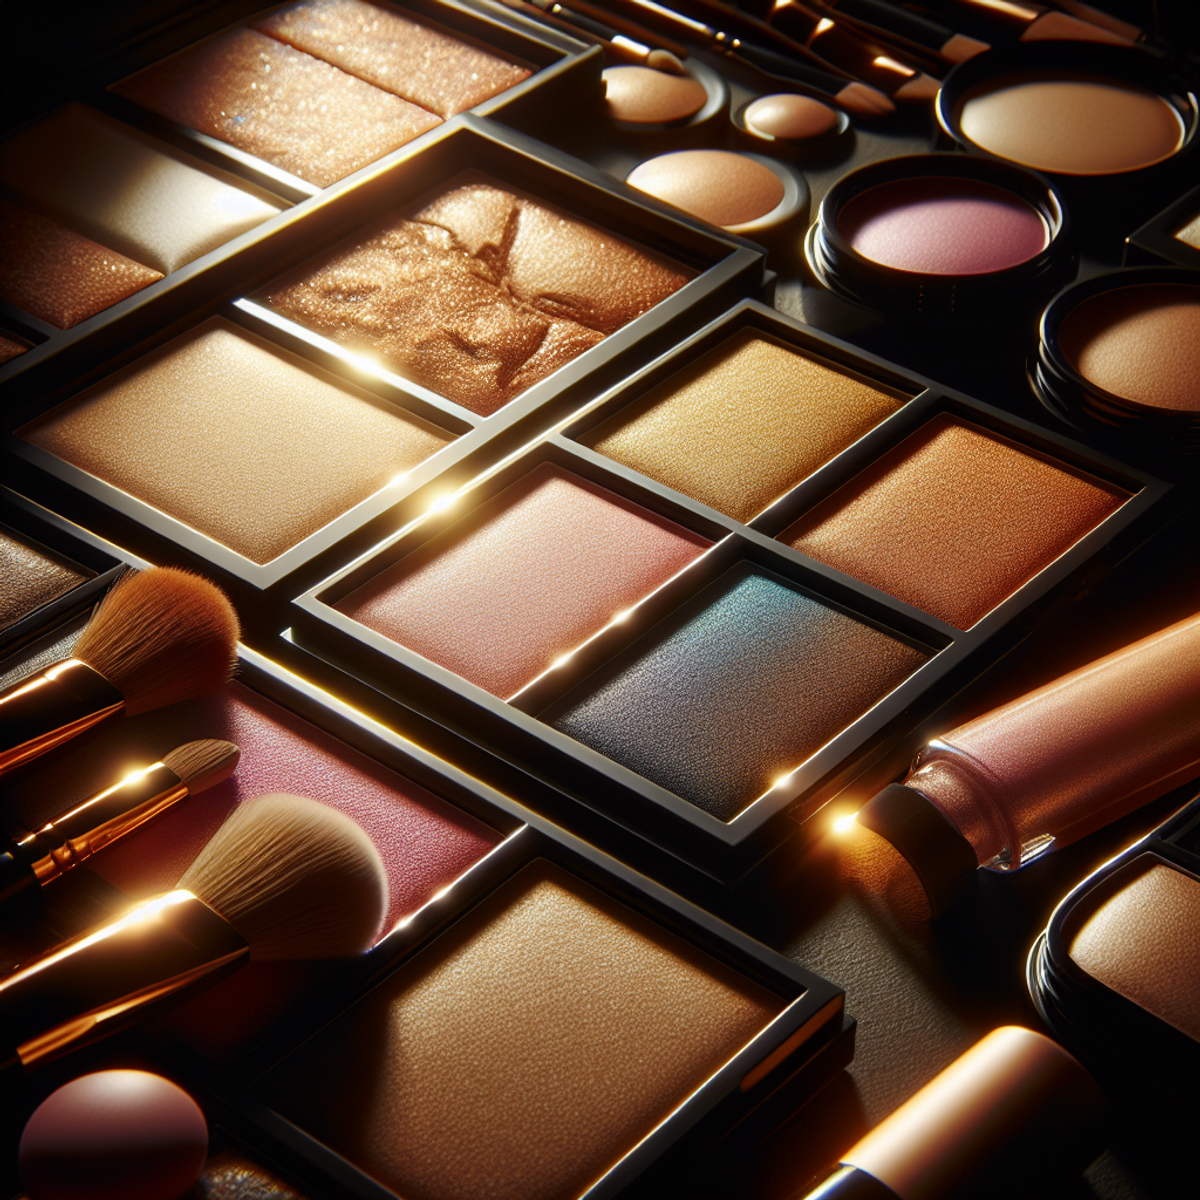
Different Types of Highlighter Formulations
In addition to choosing the right shade, you also need to consider the finish of your highlighter. Highlighters come in various formulations, including powders, creams, and sticks. Each has its own advantages:
- Powders: Powder highlighters are easy to use and blend effortlessly onto the skin. They offer a wide range of finishes, from matte to shimmery. Powder highlighters work well for all skin types, but they are particularly suitable for oily skin as they help control shine.
- Creams: Cream highlighters have a smooth and creamy texture that melts into the skin for a natural-looking glow. They are perfect for dry or mature skin as they provide hydration and a dewy finish. Cream highlighters can be applied with your fingers or a damp sponge for seamless blending.
- Sticks: Highlighter sticks are incredibly convenient and travel-friendly. They have a creamy consistency that glides smoothly onto the skin. Stick highlighters are ideal for on-the-go touch-ups and can be easily applied directly to the desired areas.
Matte vs Shimmery Highlighters
Another aspect to consider when choosing a highlighter is the finish – whether you prefer a matte or shimmery effect. Here’s a breakdown of each:
- Matte Highlighters: Matte highlighters provide a subtle glow without any shimmer particles. They create a more natural-looking effect and are suitable for everyday wear or when you want a more understated look.
- Shimmery Highlighters: Shimmery highlighters, on the other hand, contain light-reflecting particles that give your skin an intense luminosity. They deliver a radiant and eye-catching glow, making them perfect for special occasions or when you want to make a statement.
Ultimately, the choice between matte and shimmery highlighters depends on your personal preference and the occasion. You can even mix both finishes to achieve a customized glow that suits your style.
Understanding the different types of highlighter shades, formulations, and finishes is crucial in achieving flawless highlighting and contouring results. Now that you have a better understanding of these products, let’s move on to the next section and explore blending techniques for seamless application.
Blending Techniques for Seamless Application
When it comes to mastering the art of highlighting and contouring, seamless blending is key to achieving a flawless and natural-looking finish. Blending out highlighter and contour products smoothly requires essential tips and tricks to avoid harsh lines and create a cohesive makeup look.
Understanding Highlighters and Contour Products
Highlighter shades come in various formulations such as powders, creams, and sticks, each with unique qualities and effects on the skin’s texture. These products are designed to bring forward specific areas of the face by adding light and luminosity, creating a radiant and sculpted appearance. On the other hand, contour products are used to create shadows and definition, enhancing the natural structure of the face.
Blending Techniques
Highlighter Shades:
Whether you prefer matte or shimmery highlighters, it’s crucial to choose lighter shades that complement your skin tone for a subtle yet impactful effect.
Powders, Creams, Sticks:
Each formulation offers different benefits. Powders are ideal for oily skin types and setting makeup, while creams provide a dewy finish for dry skin. Sticks offer precision and convenience for targeted application.
Blend Like a Pro:
Use a soft, fluffy brush or makeup sponge to blend highlighter seamlessly onto the high points of your face such as the cheekbones, brow bone, and down the bridge of the nose. Gentle tapping or swirling motions ensure an even application without disrupting the foundation underneath. For achieving the perfect nose shape through blending techniques, you might find this guide on nose makeup contouring helpful.
Avoid Harsh Lines:
To prevent any demarcation between your highlighter and foundation, take time to blend carefully along the edges. Softening the transition areas creates a natural gradient that enhances facial features without looking overly dramatic. Contouring and highlighting techniques for photography can provide additional insights on creating a seamless finish.
In essence, mastering blending techniques for highlighter and contour products elevates your makeup game by creating dimension and luminosity while maintaining a harmonious balance between light and shadow on the face.
Highlighting Key Areas of the Face
Highlighting is an important step in applying makeup because it adds depth and brightness to the face by bringing out specific features through light. Let’s explore the main areas of the face where highlighting can have a transformative effect.
1. Under Eyes
Applying highlighter under the eyes can help hide dark circles and create a fresh, wide-awake appearance. Use a lightweight, glowing concealer or a subtle shimmer highlighter to softly brighten this area.
2. Cheekbones
One of the most popular areas to highlight, emphasizing the cheekbones adds definition and radiance to the face. Gently sweep your highlighter along the highest points of your cheekbones for a lifted effect.
3. Nose Bridge
Adding a bit of highlighter down the bridge of your nose can give the illusion of a taller, straighter nose. Be careful not to apply too much product here, as it can make your nose look oily instead of radiant.
4. Brow Bone
Highlighting the brow bone helps lift and accentuate the eyes. You can use a subtle shimmer or a matte highlighting shade for this purpose.
When applying highlighter to these areas, remember that less is often more. It’s important to be subtle when aiming for a natural and glowing finish. Try out different textures like powder, cream, or liquid highlighters to discover what works best for each feature on your face.
Additional Areas to Consider: Cupid’s Bow and Inner Corner of Eyes
In addition to the key areas mentioned above, there are two more spots where highlighting can make a difference:
5. Cupid’s Bow
By highlighting your cupid’s bow (the curve on your upper lip), you can enhance your lip shape and create an impression of fuller lips. Apply a small amount of highlighter to this area for a soft and defined look.
6. Inner Corner of Eyes
Applying highlighter to the inner corner of your eyes can instantly brighten up your gaze, making you appear more awake and alert. This technique is particularly beneficial for tired or dull-looking eyes.
Remember, makeup is an art form, and there are no hard rules. Feel free to adapt these techniques based on your preferences and unique facial features. The most important thing is to have fun and embrace your own beauty!
Contouring for Facial Sculpting and Definition
Contouring is a technique used to define facial features and create the illusion of depth and structure. By strategically applying darker shades of makeup, you can sculpt your face and enhance its overall appearance. In this section, we will explore the key areas of the face that can be contoured for a more sculpted look: cheekbones, nose, and jawline.
Defining Cheekbones
Contouring the cheekbones can help create a more defined and chiseled appearance. Here’s how you can achieve this:
- Start by selecting a contour shade that is one to two shades darker than your natural skin tone. You can use a powder or cream contour product based on your preference.
- Use a contour brush or a small angled brush to apply the product just below your cheekbones. Start from the hairline near your ear and blend downward towards the corner of your mouth.
- Remember to blend well to avoid harsh lines. You want the contour to seamlessly blend into your foundation for a natural-looking result.
- If desired, you can also apply a highlighter above your cheekbones to further enhance the contrast between light and shadow.
For more detailed information on choosing between bronzer and contour, including tips on which one suits different face shapes, refer to this resource.
Sculpting the Nose
Contouring the nose can help create the illusion of a slimmer or more defined shape. Here’s how you can contour your nose effectively:
- Choose a contour shade that is slightly darker than your natural skin tone. You can use a small, fluffy brush or an angled brush for precision.
- Apply the contour shade along the sides of your nose, starting from the inner corner of your eyebrows and blending downwards towards the tip of your nose.
- To make your nose appear slimmer, apply the contour shade in straight lines along the sides of your nose. If you want to shorten or lengthen your nose, you can adjust the placement of the contour accordingly.
- Blend the contour shade well to ensure a seamless transition between the contour and your foundation. You can use a clean brush or a beauty sponge to blend out any harsh lines.
For personalized tips on contouring based on face shape, including specific techniques for different nose shapes, this resource offers valuable insights.
Enhancing the Jawline
Contouring the jawline can help create a more defined and sculpted look. Here’s how you can contour your jawline effectively:
- Choose a contour shade that is slightly darker than your natural skin tone. You can use a contour powder or cream product based on your preference.
- Using an angled brush, apply the contour shade along your jawline starting from your ear towards the center of your chin.
- Blend the contour shade well to avoid any visible lines. Focus on blending downwards towards your neck to create a seamless transition.
- If desired, you can also apply a highlighter or illuminating powder on the center of your chin to further enhance the definition of your jawline.
To gain a deeper understanding of [contouring techniques for different facial features and face shapes](https://kendrapowell.com/blog/how-to-contour-for-your-features-face-sh
Bringing It All Together: Blending and Balancing
Blending and balancing are crucial elements of highlighting and contouring. In this section, we’ll explore the importance of seamless blending and share tips on how to achieve natural-looking results.
Importance of Seamless Blending
Blending is essential for achieving a flawless makeup look. When it comes to highlighting and contouring, seamless blending ensures that the transition between light and shadow is smooth and invisible. Without proper blending, the makeup can look harsh and unnatural. Here’s what you need to know about seamless blending:
- Blending Tools: Investing in high-quality brushes or sponges designed for blending can make a significant difference in achieving a seamless look. These tools help diffuse the product evenly without leaving any harsh lines.
- Layering Technique: Gradually building up the intensity of the highlighter and contour products through light layers allows for better control over the blending process. This approach prevents over-application, making it easier to blend out any harsh edges.
Achieving a Balanced Effect
Creating a balanced effect with light and shadow on the face is crucial for a harmonious and natural-looking result. Here are some tips to achieve this balance:
- Subtle Application: Start with a small amount of product and gradually build up as needed. This prevents excessive application, making it easier to achieve a balanced look without overpowering either the highlight or contour.
- Natural Light Consideration: When applying makeup, consider the lighting conditions in which you will be seen. Natural daylight provides the most accurate representation of how your makeup will appear in different settings, helping you achieve a balanced effect that looks flattering in any environment.
- Customization: Tailoring your highlighting and contouring techniques to suit your unique facial features can contribute to a more balanced outcome. Not all faces have the same structure, so customizing the placement of highlighter and contour based on individual features leads to a more harmonious result.
By mastering blending techniques and focusing on achieving a balanced effect, you can elevate your highlighting and contouring skills to create a cohesive makeup look that enhances your natural beauty.
Mastering the Art of Highlighting and Contouring
Practice and experimentation are the keys to mastering highlighting and contouring techniques in makeup. While these techniques may seem intimidating at first, with time and practice, you can become proficient in creating a flawless, sculpted look. Here are some tips and tricks to help you become a highlight and contour pro:
1. Start with the basics
Before diving into advanced techniques, it’s important to understand the fundamentals of highlighting and contouring. Familiarize yourself with the different products available, such as powders, creams, or sticks, and experiment with various shades to find the ones that suit your skin tone best.
2. Invest in the right tools
Having the right brushes or beauty sponges can make a significant difference in your application technique. For example, a small angled brush is perfect for precise contouring along the cheekbones, while a fluffy brush is ideal for blending out highlighter.
3. Find your face shape
Different face shapes require different highlighting and contouring techniques. Take some time to identify your face shape (oval, round, heart-shaped, etc.) and research specific techniques that will enhance your features.
4. Blend, blend, blend
Blending is essential when it comes to achieving a natural-looking finish. Use light-handed strokes to blend out both highlighter and contour products, focusing on creating seamless transitions between light and shadow areas.
5. Practice on different lighting conditions
Lighting can significantly affect how your makeup looks. Experiment with applying highlighter and contour in both natural daylight and artificial lighting to ensure your application looks flattering in any situation.
6. Experiment with different finishes
While matte highlighters are great for a subtle glow, shimmery highlighters can add an extra luminosity to your complexion. Play around with different finishes to see which one suits your personal style best.
7. Take inspiration from others
Social media platforms like Instagram and YouTube are treasure troves of makeup inspiration. Follow professional makeup artists or beauty influencers who specialize in highlighting and contouring techniques for tips and tricks.
8. Take your time
Don’t rush through the process of highlighting and contouring. Take your time to build up the product gradually, blending as you go, until you achieve your desired effect.
9. Experiment with different placements
While there are common areas to highlight and contour, such as the cheekbones and nose, don’t be afraid to experiment with other areas of the face. For example, try highlighting the chin or inner corner of the eyes for a unique twist on the traditional techniques.
10. Embrace your uniqueness
Remember that makeup is an art form, and there are no strict rules when it comes to highlighting and contouring. Embrace your unique features and experiment with different techniques that make you feel confident and beautiful.
For those with darker skin tones, it’s important to note that contouring techniques may
Conclusion
Highlighting and contouring techniques are powerful tools that can transform your makeup look, giving you a luminous and sculpted appearance. By playing with light and shadow, these techniques create depth and dimension, enhancing your natural features.
Embrace Your Unique Features
One of the most important aspects of highlighting and contouring is celebrating what makes you unique. These techniques allow you to enhance your best features and create a personalized makeup look that complements your individuality. Don’t be afraid to experiment with different shades, textures, and application techniques to find what works best for you.
Enhancing Specific Features
Highlighting specific areas of the face can really make a difference in your overall look. By applying highlighter strategically, you can bring forward certain features and create a beautiful glow. Consider focusing on:
- Under the eyes: Applying a lighter shade of highlighter in a triangular shape under the eyes can help brighten the area and give the illusion of a well-rested look.
- Cheekbones: Highlighting the tops of your cheekbones can add a youthful glow and make them appear more pronounced.
- Nose bridge: Applying highlighter down the bridge of your nose can create a slimming effect and draw attention to this central feature.
- Brow bone: Adding a touch of highlighter to the brow bone can lift the eyes and create an instant eye-opening effect.
In addition to these areas, consider exploring other options such as highlighting the cupid’s bow (top of the upper lip) to enhance your lip shape and applying highlighter to the inner corner of your eyes for an awakened look.
Sculpting Your Facial Structure
Contouring is all about creating shadows to define and sculpt your facial structure. By strategically applying contour products, you can enhance your cheekbones, slim down your nose, and create a more defined jawline. Some key areas to focus on include:
- Cheekbones: Apply a contour shade just below the cheekbones to create the illusion of higher and more prominent cheekbones.
- Nose: Use a contour powder or cream to subtly sculpt the sides of your nose, making it appear slimmer and more defined.
- Jawline: Apply contour along the jawline to add definition and create a more chiseled appearance.
Remember, blending is key when it comes to achieving a seamless and natural-looking result. Take your time to blend out any harsh lines and ensure that the highlighter and contour products seamlessly merge with each other.
Practice Makes Perfect
Lastly, mastering highlighting and contouring techniques takes practice and experimentation. Don’t be discouraged if your first attempts don’t turn out exactly as you envisioned. Keep practicing, watch tutorials, and try different products until you find what works best for you. Remember, makeup is an art form, and it’s all about self-expression.
So go ahead, have fun with makeup, and embrace your unique features through highlighting and contouring techniques. With the right products, application techniques, and a little bit of practice, you can achieve a luminous and sculpted appearance that enhances your natural beauty. Happy highlighting and contouring!