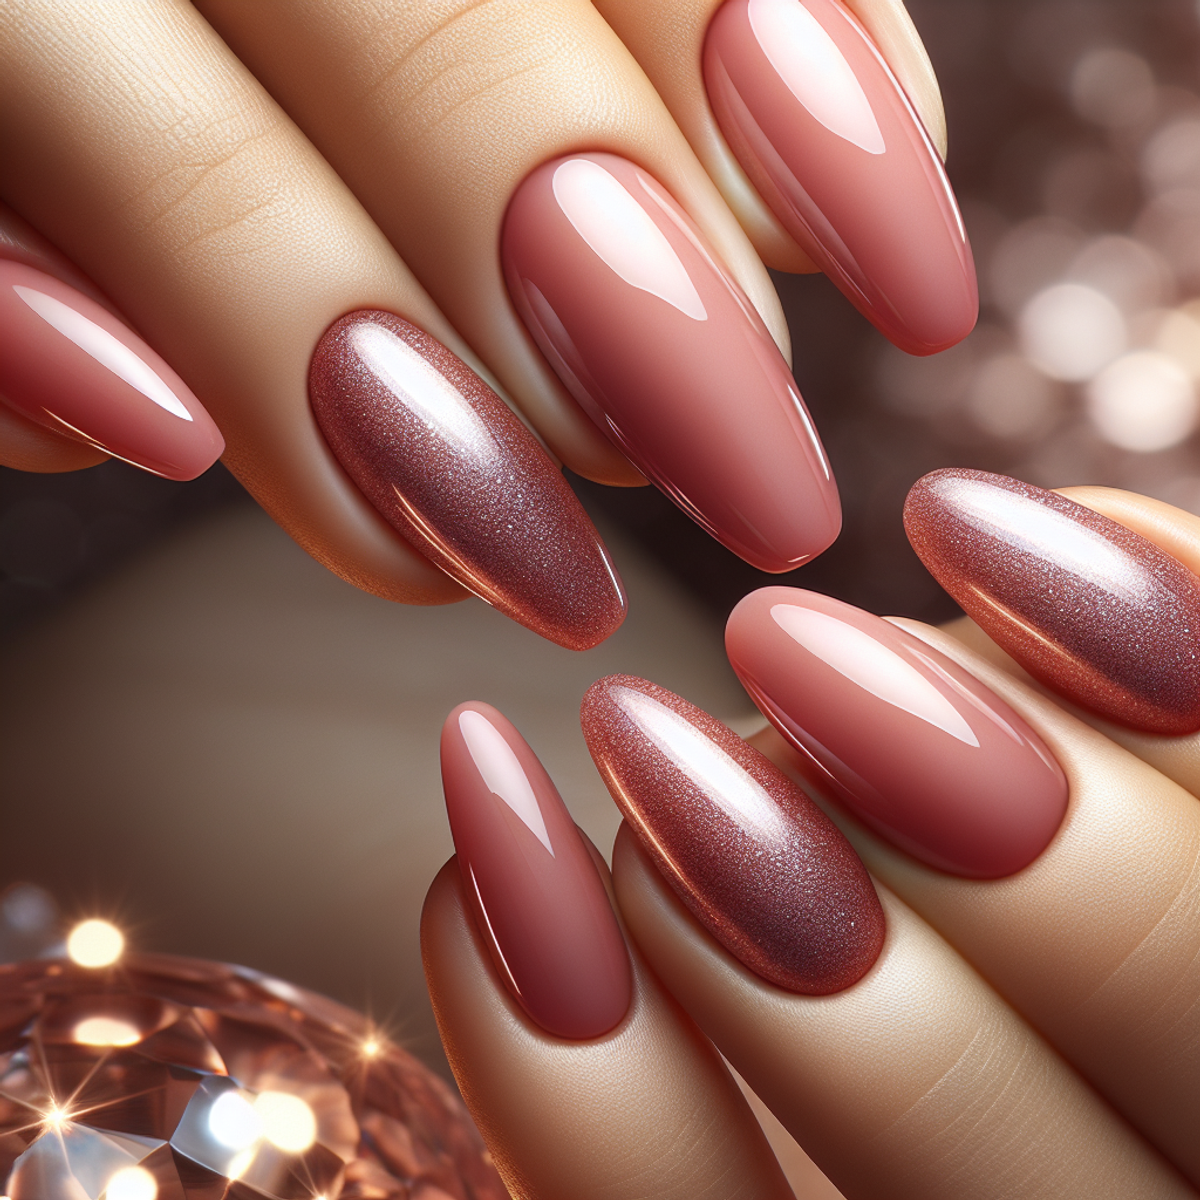
Everything You Need to Know About Builder Gel Nail Polish

Introduction to Builder Gel Nail Polish
Builder gel nail polish is a specialized type of gel product designed to add strength and structure to natural nails. It is used to create a flexible enhancement, particularly for individuals whose nails are prone to lifting. Builder gel comes in three main types: soft gel, semi-hard gel, and hard gel, offering varying levels of viscosity and durability.
Talking points:
- Definition and purpose of builder gel nail polish: Builder gel is applied directly onto the natural nails to provide additional strength and support. It is especially beneficial for those with weak or damaged nails, as it helps prevent chipping and breakage.
- Benefits of using builder gel nail polish: This type of nail polish offers enhanced durability and longevity compared to traditional nail polish. It provides a protective layer that can help maintain the health and appearance of natural nails.
- Why builder gel nail polish is gaining popularity: The rising popularity of builder gel nail polish can be attributed to its ability to address common nail concerns such as brittleness and breakage. Additionally, its versatility in creating various nail shapes and designs has contributed to its increasing demand among nail enthusiasts.
Understanding the Different Types of Builder Gel Nail Polish
When it comes to builder gel nail polish, there are three main types that you should be familiar with:
- Soft Gel: This type of builder gel is more flexible and has a lighter viscosity compared to the other types. Soft gel is often used for adding a thin layer of strength and protection to the natural nail.
- Semi-hard Gel: As the name suggests, semi-hard gel falls between soft gel and hard gel in terms of viscosity and flexibility. It provides a balance between durability and flexibility, making it suitable for various nail enhancements.
- Hard Gel: Hard gel is the most rigid and durable type among the three. It is designed to add substantial strength and thickness to the nails, making it ideal for nail extensions and sculpting.
Each type of builder gel offers unique properties that cater to different nail enhancement needs. By understanding the distinctions between soft gel, semi-hard gel, and hard gel, you can choose the most suitable option based on your desired outcome and nail condition.
The Application Process for Builder Gel Nail Polish
Applying builder gel nail polish may seem intimidating at first, but with the right technique and a little practice, you can achieve salon-quality results from the comfort of your own home. In this section, we will guide you through the step-by-step process of applying builder gel nail polish and share some tips and tricks for a flawless application.
Preparation before Applying Builder Gel Nail Polish
Before you begin the application process, it’s important to properly prepare your nails. Follow these steps to ensure the best results:
- Start with clean nails: Remove any old polish and make sure your nails are clean and dry. Use a gentle nail polish remover to eliminate any oils or residue.
- Shape and buff: File your nails to your desired shape and gently buff the surface of each nail. This will create a smooth canvas for the builder gel.
- Push back cuticles: Gently push back your cuticles using a cuticle pusher or an orangewood stick. This will help prevent lifting and promote better adhesion of the gel.
- Dehydrate your nails: Apply a nail dehydrator or rubbing alcohol to remove any remaining oils from your nails. This step is crucial for ensuring proper adhesion of the builder gel.
Step-by-Step Guide to Applying Builder Gel Nail Polish
Now that your nails are prepped, let’s dive into the step-by-step process of applying builder gel nail polish:
- Apply a base coat: Start by applying a thin layer of base coat to each nail. This will provide extra adhesion and protect your natural nails from staining.
- Cure under UV/LED light: Place your hand under a UV or LED lamp and cure the base coat according to the manufacturer’s instructions. This typically takes about 30 seconds to one minute per layer.
- Apply the builder gel: Using a gel brush, carefully apply a thin layer of builder gel to each nail. Be sure to cover the entire nail surface, avoiding the cuticles and skin. If you’re using a colored builder gel, apply it in thin, even strokes for an even application.
- Cure under UV/LED light: Once you’ve applied the builder gel, cure your nails under the UV or LED lamp for the recommended time. This usually ranges from one to three minutes, depending on the brand and type of lamp.
- Repeat if necessary: If you want to build additional strength or thickness, repeat steps 3 and 4 to apply another layer of builder gel. Remember to cure each layer before proceeding.
- Seal with a top coat: To complete your builder gel manicure, apply a thin layer of top coat to seal and protect the builder gel. Cure it under the UV or LED lamp for the recommended time.
- Finish with cuticle oil: After curing your nails, gently massage cuticle oil into your nails and cuticles to hydrate and nourish them. This will give your manicure a professional touch while promoting healthy nail growth.
Tips and Tricks for a Flawless Application
To achieve the best results when applying builder gel nail polish, keep these tips in mind:
- Thin layers are key: It’s better to apply multiple thin layers of builder gel rather than one thick layer. This will ensure even curing and reduce the chances of chipping or lifting.
- Avoid contact with skin: When applying the builder
Proper Maintenance and Removal Techniques for Builder Gel Nail Polish
Proper maintenance is key to ensuring the longevity and durability of your builder gel nail polish. Additionally, knowing the correct techniques for removal is crucial to avoid any damage to your natural nails. Here are some tips and guidelines to help you maintain your manicure and remove builder gel nail polish effectively:
Tips for maintaining the longevity of your manicure:
- Protect your nails: Avoid activities that can put excessive strain on your nails, such as using them as tools or biting them. Wear gloves while doing household chores or working with harsh chemicals to prevent any damage.
- Moisturize regularly: Hydrated nails are less prone to breakage, so moisturize your cuticles and nails daily with a nourishing oil or cuticle cream. This helps to keep your nails healthy and prevents them from becoming dry and brittle.
- Avoid prolonged water exposure: Excessive exposure to water can weaken the bond between the builder gel and your natural nails, leading to lifting or chipping. Whenever possible, wear gloves when washing dishes or soaking in water for an extended period.
- Be cautious with abrasive activities: While builder gel is durable, it’s still important to be mindful of activities that can cause excessive friction or trauma to your nails. Avoid using rough files or buffers directly on the gel surface, as this can weaken its integrity.
- Apply a top coat regularly: To protect your builder gel manicure from chipping or peeling, apply a thin layer of clear top coat every few days. This helps to seal and reinforce the edges of the polish, prolonging its lifespan.
Proper removal techniques to avoid damage to the nails:
When it’s time to remove your builder gel nail polish, it’s essential to do so carefully to avoid causing any harm or weakening your natural nails. Follow these steps for a safe and effective removal process:
- Gentle filing: Using a soft nail file, gently buff the shiny top layer of the builder gel polish. This step helps to break the seal and roughen the surface, making it easier for the removal solution to penetrate.
- Soak-off method: Soak a cotton ball or pad in acetone-based nail polish remover and place it on your nail. Secure it in place by wrapping each finger with aluminum foil or using nail clips specifically designed for soaking off gel polish.
- Wait patiently: Allow the acetone-soaked cotton to sit on your nails for about 10-15 minutes. This gives enough time for the gel polish to soften and loosen its bond with your natural nails.
- Gently remove: After the waiting period, gently press down on the foil-wrapped cotton pad and twist it while pulling it away from your nails. The softened gel polish should come off easily with minimal effort.
- Nourish and moisturize: Once all the gel polish has been removed, wash your hands thoroughly and apply a generous amount of cuticle oil or moisturizer to hydrate and nourish your nails and cuticles.
Remember, proper maintenance and removal techniques are essential for maintaining healthy nails while enjoying the benefits of builder gel nail polish. By following these tips, you can ensure that your manicure remains beautiful and long-lasting, without causing any damage to
DIY Guide: How to Do Builder Gel Nail Polish at Home
If you’re a fan of builder gel nails and want to save some money or simply enjoy the satisfaction of doing your own manicures, you’ll be happy to know that you can do builder gel nails at home. With the right materials and a little practice, you can achieve salon-quality results in the comfort of your own home. Here’s a step-by-step guide to help you get started:
Can you do builder gel nails at home? Exploring the possibilities
Yes, it is absolutely possible to do builder gel nails at home. Many nail enthusiasts have successfully mastered the art of applying builder gel and achieved professional-looking results on their own nails. With some patience and practice, you can become proficient in applying builder gel as well.
Materials needed for DIY application of builder gel nail polish
Before you begin, make sure you have the following materials ready:
- Builder gel: Choose a high-quality builder gel in your preferred brand and shade. Consider factors such as viscosity, color options, and brand reputation when making your selection.
- UV or LED lamp: Builder gels require curing under UV or LED lamps to harden and set properly. Ensure that you have a lamp that is compatible with the gel you are using.
- Nail file and buffer: You’ll need these tools for shaping and prepping your nails before applying the builder gel.
- Cuticle pusher: Use a cuticle pusher to gently push back your cuticles before starting the application process.
- Cleanser or alcohol: This is used to remove any residue or oils from your nails before applying the builder gel.
- Nail forms or tips: Depending on your desired nail shape, you may need either nail forms or tips to create extensions or overlays with the builder gel.
- Gel brush: A good quality gel brush will help you apply the builder gel smoothly and evenly.
Step-by-step guide to doing builder gel nails at home
1. Prep your nails
Start by removing any existing nail polish and gently push back your cuticles. File and shape your nails to your desired length and shape, then buff the surface of each nail to create a slight roughness that will help the gel adhere better.
2. Apply a base coat
Apply a thin layer of base coat or bonder to each nail, making sure to avoid touching your cuticles or skin.
3. Sculpt or apply tips
If you want to extend the length of your nails, you can either sculpt the builder gel directly onto your natural nails using nail forms or apply tips for added length. Follow the instructions provided with the nail forms or tips for proper application.
4. Apply the builder gel
Using a gel brush, carefully apply a thin layer of builder gel onto each nail, starting from the cuticle area and working towards the tip. Be sure to apply an even layer and avoid flooding the cuticle area.
5. Cure under a UV or LED lamp
Place your nails under a UV or LED lamp and cure them according to the instructions provided with the builder gel. This usually takes around 2-3 minutes per layer.
6. Repeat if necessary
Depending on the desired thickness and strength of your nails, you may need to apply additional layers of builder gel. Remember to cure
Tips for Choosing the Best Builder Gel Nail Polish Products
When it comes to choosing the best builder gel nail polish products, there are several factors to consider to ensure that you achieve the desired results. Before making your selection, take into account the following essential aspects:
Factors to Consider When Choosing a Builder Gel Nail Polish Product
- Viscosity: The thickness of the builder gel is important. Choose a thicker one for more pronounced nail enhancements and a thinner one for a more natural look.
- Color Options: Look for builder gel nail polish products that offer a wide range of color options. This allows for creativity and versatility in creating beautiful nail designs and styles.
- Brand Reputation: Research the reputation of different brands in the market. A reputable brand is likely to provide high-quality products that are reliable and trusted by professional nail technicians and enthusiasts.
Popular Brands in the Market and Their Features
There are numerous builder gel nail polish brands available in the market, each offering unique features and benefits. Some popular brands renowned for their quality and performance include:
- Gelish: Known for its extensive color range and long-lasting formulas.
- IBD Builder Gel: Trusted for its strength-building properties and durability.
- OPI GelColor: Recognized for its vibrant colors and high-gloss finish.
Each brand may have specific characteristics that cater to different preferences and needs, so it’s essential to explore the features offered by various brands before making a decision.
Reviews and Recommendations from Nail Enthusiasts
Seeking reviews and recommendations from experienced nail technicians and enthusiasts can provide valuable insights into the performance of different builder gel nail polish products. Online forums, social media groups, and beauty communities often feature discussions and reviews on various products, offering firsthand experiences and recommendations.
By considering these factors and gathering information on popular brands’ features, you can make an informed decision when selecting the right builder gel polish for your specific nail enhancement needs.
Common Questions About Builder Gel Nail Polish Answered
As builder gel nail polish continues to gain popularity, it’s natural to have questions about this versatile product. In this section, we will answer some common FAQs about builder gel nail polish to help you better understand its benefits and application.
Are builder gel nails safe for natural nails?
One of the main concerns when it comes to nail enhancements is the safety of your natural nails. Builder gel nails are generally considered safe when applied and removed correctly. However, it’s important to note that improper application or removal can potentially damage your natural nails.
To ensure the safety of your natural nails, it is recommended to:
- Seek professional assistance: If you’re new to builder gel nails, consider visiting a professional nail technician who has experience working with these products. They can apply and remove the gel correctly, minimizing the risk of damage.
- Follow proper removal techniques: Avoid peeling or picking off the gel as this can lead to nail damage. Instead, soak the nails in acetone or use a gel polish remover specifically designed for builder gels. This will safely dissolve the gel without causing harm to your natural nails.
How long does builder gel polish last?
One of the advantages of using builder gel polish is its long-lasting properties. When applied correctly and with proper maintenance, builder gel polish can last up to three weeks or even longer.
The longevity of builder gel polish depends on various factors such as:
- Nail health: Healthy and strong nails tend to hold onto the gel better than weak or damaged nails.
- Application technique: Properly applied builder gel with thin layers and full coverage has a better chance of lasting longer.
- Nail care routine: Regularly moisturizing your cuticles and using cuticle oil can help extend the life of your builder gel polish.
- Lifestyle habits: Certain activities like excessive hand washing, exposure to harsh chemicals, or frequent use of hand sanitizers can impact the lifespan of your gel polish.
To maximize the lifespan of your builder gel polish, it’s important to follow proper nail care routines and avoid activities that may cause premature lifting or chipping.
Can you use regular nail polish over builder gel?
Yes, you can use regular nail polish over builder gel. This allows you to change up your nail color without removing the builder gel underneath. However, there are a few things to keep in mind:
- Prep the surface: Before applying regular nail polish, make sure the surface of the builder gel is smooth and free from any residue. Lightly buff the surface and cleanse it with a gel cleanser or rubbing alcohol to ensure proper adhesion.
- Choose thin coats: When applying regular nail polish on top of builder gel, opt for thin coats to prevent excessive thickness. Thick layers can lead to longer drying times and a higher chance of chipping.
- Seal with top coat: To protect the regular nail polish and extend its wear time, apply a layer of high-quality top coat over the color. This will provide an extra layer of protection against chipping and enhance the overall shine.
Using regular nail polish over builder gel allows for greater flexibility in changing your nail color while still maintaining the strength and durability provided by
The Verdict on Builder Gel Nail Polish: Is It Worth the Hype?
Builder gel nail polish offers versatile and long-lasting results, making it a popular choice for nail enthusiasts seeking strength and durability. The thicker viscosity of builder gel provides added strength and resilience to natural nails, making it an ideal option for individuals with weak or damaged nails. The ability to lengthen nails and build strength at the apex makes builder gel a valuable solution for those experiencing lifting or breakage issues. The lasting power of builder gel polish without chipping ensures a manicure that can withstand daily activities and maintain its flawless appearance for an extended period.
The benefits and versatility of builder gel nail polish make it a worthwhile investment for individuals looking to enhance the strength and durability of their nails while enjoying long-lasting, professional-looking manicures. Its popularity among both professionals and DIY enthusiasts is a testament to its effectiveness in providing resilient and beautifully polished nails.


