Gorgeous Velvet Nail Ideas to Try This Holiday Season

Introduction
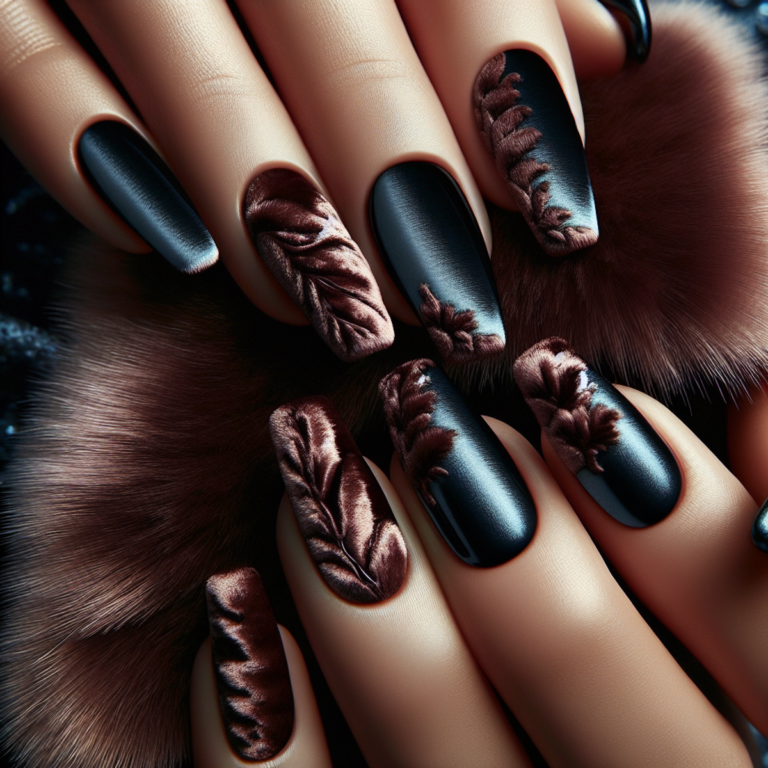
Velvet nails are the latest trend taking social media by storm, and they are the perfect manicure style to embrace this holiday season. With their luxurious texture and stunning appearance, velvet nails can add a touch of elegance and sophistication to any festive look.
In this article, we will explore various gorgeous velvet nail ideas using different techniques and shades to inspire you to try out this glamorous manicure style for the holidays.
1. Semi-Metallic Polishes for Velvet Nails
When it comes to creating stunning velvet nail designs, semi-metallic polishes are a fantastic choice. These polishes have a subtle shimmer that adds depth and dimension to your nails, giving them a luxurious velvety effect. Here’s why semi-metallic polishes are perfect for velvet nails:
Creating a velvety effect
The combination of the metallic sheen and the velvety texture creates a unique and eye-catching look. The shimmer in semi-metallic polishes reflects light beautifully, giving your nails a soft and plush appearance.
Gorgeous velvet nail ideas
There are countless ways to incorporate semi-metallic polishes into your velvet nail designs. Here are some examples to inspire you:
- Rose Gold Elegance: Apply a base coat of rose gold semi-metallic polish and let it dry. Then, use a matte top coat to create the velvety finish. This design is perfect for a glamorous holiday party or a romantic date night.
- Silver Snowflakes: Start with a silver semi-metallic polish as the base color. Once it’s dry, use a white stamping polish and a snowflake design plate to add delicate snowflakes to your nails. Finish with a matte top coat for that velvet-like texture.
- Midnight Blue Magic: Paint your nails with a deep blue semi-metallic polish, allowing it to dry completely. Then, use a fine brush or dotting tool to create small dots with black polish. This celestial-inspired design is perfect for adding some mystique to your holiday look.
Tips for achieving a flawless velvet finish
To ensure your velvet manicure looks flawless, follow these tips from this manicure guide:
- Start with well-prepped nails by filing them into your desired shape and pushing back the cuticles.
- Apply a base coat to protect your nails from staining and to create a smooth surface for the polish. This step is crucial for achieving a flawless velvet finish.
- When applying the semi-metallic polish, be sure to use thin, even coats to avoid streaks or clumps. You can apply multiple layers for a more intense shimmer if desired.
- Once the polish is completely dry, apply a matte top coat to transform the metallic sheen into a velvety texture. This will give your nails that soft and plush appearance.
By using semi-metallic polishes for your velvet nail designs, you can achieve a stunning and luxurious look that’s perfect for the holiday season. Experiment with different shades and designs to find your favorite velvet nail style. If you’re looking for an alternative to traditional nail polish, you could also try DIY dip powder nails at home for a long-lasting and professional-looking manicure. Get ready to turn heads with your velvety manicure!
2. Flocking Powder: The Textured Magic for Velvet Nails
Flocking powder is a game-changer when it comes to creating stunning velvet nail looks. This magical powder adds texture and depth to your manicure, giving it a luxurious velvet finish that is sure to turn heads. Here are some key points to know about flocking powder and how to use it for beautiful velvet nails:
Adding Texture and Depth
Flocking powder is made up of tiny fibers that create a velvety texture on the nails. When applied, it gives your manicure a unique three-dimensional effect that is both eye-catching and elegant. The softness of the flocking powder mimics the plush feel of velvet, making it the perfect choice for achieving that luxurious look.
Different Application Methods
There are several application methods you can try to achieve stunning velvet effects with flocking powder. Here are a few popular techniques:
- Full Coverage: Apply a layer of clear or colored nail polish and while it’s still wet, sprinkle the flocking powder over the entire nail. Gently press down on the powder to ensure it adheres well. Once dry, brush off any excess powder for a velvety finish.
- Gradient Effect: Create an ombre or gradient effect by applying a base color and then using a sponge applicator or brush to dab on flocking powder at the tips of your nails. Gradually build up the intensity of the powder towards the tips for a smooth transition from color to texture.
- Accent Nail: For a more subtle look, consider using flocking powder on just one or two accent nails. Apply a contrasting or coordinating polish and then follow the full coverage method mentioned above on those specific nails. This creates an interesting contrast between the velvety texture and the smoothness of the other nails.
Inspiring Designs
Flocking powder opens up a world of possibilities when it comes to velvet nail designs. Here are a few inspiring ideas to get your creative juices flowing:
- Velvet Animal Print: Apply a base color in a leopard or zebra print pattern, and then use flocking powder to add texture to the spots or stripes. This will give your nails a unique and tactile feel that stands out from the crowd.
- Velvet French Tips: Create a classic French manicure with a twist by adding flocking powder to the tips of your nails instead of using traditional white polish. This adds a touch of luxury and sophistication to the overall look.
- Velvet Floral Accent: Apply a floral nail decal or stamp onto your nails and then use flocking powder on top of the design. This will create a beautiful contrast between the smoothness of the decal and the velvety texture surrounding it.
Flocking powder truly is the textured magic for velvet nails. Its ability to add depth and dimension to your manicure is unmatched, making it an ideal choice for creating luxurious looks. Experiment with different application methods and designs to find your favorite way of incorporating this unique powder into your velvet nail art repertoire.
3. Magnetic Polishes: Transforming Your Manicure into Matte Velvet
Magnetic polishes are another fantastic option for achieving a stunning velvet look on your nails. These polishes contain magnetic particles that respond to a magnet, creating mesmerizing patterns and adding depth to your manicure. Here, we’ll explore the role of magnetic polishes in achieving a matte velvet finish, provide a step-by-step guide to using them, and showcase some examples of magnetic polish designs that will make your nails stand out in velvety elegance.
The Role of Magnetic Polishes in Achieving a Matte Velvet Finish
Magnetic polishes are specifically formulated with iron particles that respond to magnets. When you apply a magnetic polish and hold a magnet over it while the polish is still wet, the iron particles move and create unique patterns on the nail surface. This technique gives your nails a velvety texture and adds an element of sophistication to your manicure.
Step-by-Step Guide to Using Magnetic Polishes for a Mesmerizing Velvet Look
Achieving a velvet look with magnetic polishes is easier than you might think. Follow these simple steps to create a mesmerizing velvet manicure:
- Start by applying a base coat to protect your natural nails and ensure longevity for your manicure.
- Choose your desired magnetic polish color. Deep jewel tones like emerald green or royal blue work wonderfully for a luxurious velvet look.
- Apply one coat of the magnetic polish to all of your nails.
- Immediately after applying the first coat of polish to each nail, hold the magnet close to the nail without touching it. Keep it in position for about 10 seconds, allowing the iron particles in the polish to respond to the magnet and create the desired pattern.
- Repeat steps 3 and 4 for each nail until you’ve completed all your fingers.
- Once you’re satisfied with the pattern on your nails, allow the polish to dry completely.
- Finish off with a glossy top coat to seal in the design and give your manicure a professional finish.
Examples of Magnetic Polish Designs That Stand Out in Velvety Elegance
Magnetic polishes offer endless possibilities for creating unique and eye-catching velvet designs. Here are some examples to inspire your next manicure:
- Velvet Waves: Apply a rich navy blue magnetic polish and use a magnet to create wavy patterns reminiscent of ocean waves. The result is a stunning velvet look that will make your nails stand out.
- Lunar Eclipse: Opt for a deep purple magnetic polish and use a magnet to achieve a captivating swirl pattern. This design mimics the mesmerizing beauty of a lunar eclipse and adds an air of mystery to your nails.
- Starlit Night: Paint your nails with a dark charcoal gray magnetic polish and use a magnet to create scattered star patterns. This celestial-inspired design will make your nails twinkle like the night sky.
With magnetic polishes, you can achieve a matte velvet finish that is both luxurious and captivating. Experiment with different colors and magnet patterns to create unique designs that reflect your personal style. Get ready to turn heads this holiday season with velvety elegance at your fingertips.
4. Exploring Rich Hues and Shades for Luxurious Velvet Nails
When it comes to velvet nails, one of the most exciting aspects is the wide range of colors available. From deep jewel tones to soft neutrals, there is a hue to suit every style and occasion. Here, we explore some of the most captivating shades for your velvet manicure masterpieces:
1. Sage Green
This muted yet sophisticated shade adds an elegant touch to your velvet nails. It exudes a sense of calmness and pairs beautifully with winter outfits.
2. Amethyst
A rich, regal purple hue, amethyst is perfect for those looking to make a bold statement with their velvet nails. It adds a touch of luxury and mystery to any look.
3. Champagne
For a more subtle and versatile option, champagne-colored velvet nails are an excellent choice. This neutral shade complements any outfit and works well for both casual and formal occasions.
4. Burnt Orange
Embrace the warmth and vibrancy of the holiday season with burnt orange velvet nails. This shade evokes feelings of coziness and adds a pop of color to your overall look.
These hues can be further enhanced by experimenting with different finishes and textures. For example, combining a semi-metallic polish with flocking powder can create a stunning velvety effect that is sure to turn heads.
In addition to these specific shades, there are countless other options available for your velvet nail designs:
- Shimmering sage
- Mauve
- Neutral champagne
- Silver
- Rose
The possibilities are endless! You can even try two-tone designs such as Frozen Mist and Faerie Glow or opt for minty shades like Bluefin and Platinum Cat Eye.
If you prefer more understated looks, nude shades like Pearl White offer a sophisticated take on the velvet trend. On the other hand, if you’re feeling adventurous, consider blue shades with a bioluminescence-like effect or snowflake designs for a touch of winter magic.
For special occasions, opal shades are perfect for weddings, while silvery hues add a touch of elegance to any event or everyday look. You can also experiment with silver nails adorned with stars or gems for a glamorous touch.
If you’re a fan of abstract nail art, consider pale pink designs that resemble velvet or coffin-shaped faux stiletto tips with black shimmering stars and minty velvet. These unique designs allow you to express your individuality and style through your manicure.
To achieve a pale gray velvet look, try Live Love Polish’s Ethereal Chill ($15). This shade adds a cool and sophisticated touch to your velvet nails, making them stand out in velvety elegance.
When exploring the rich hues and shades available for velvet nails, it’s worth considering how colored pearls such as soft pinks and iridescent blues can inspire your manicure choices. Additionally, taking inspiration from the comprehensive guide on true summer color analysis can help you find complementary shades that suit your skin tone.
Remember, the world of velvet nail colors is vast and ever-evolving. Just like [dahlia breeding](https://www.f
5. Specific Velvet Nail Designs to Rock This Holiday Season
In this section, we will provide you with step-by-step instructions to create three stunning velvet nail designs that are perfect for the holidays:
- Fire-inspired Gold Velvet Manicure
- Start with a base coat of deep red or burgundy nail polish.
- Once dry, apply a semi-metallic gold polish on top.
- Gently press the flocking powder into the wet polish to create a velvet texture.
- Finish with a glossy topcoat on all nails except for the ring finger, where you’ll leave the velvety texture exposed for a captivating contrast.
- Elegant Nude Velvet with a Twist
- Begin by painting your nails with a neutral nude polish as the base color.
- Next, apply a layer of semi-metallic rose gold polish on top.
- While the polish is still wet, sprinkle the flocking powder onto the nails to create a velvety finish.
- For an added twist, use a thin nail art brush to create delicate swirls or patterns on one accent nail, adding an extra touch of elegance to this stunning design.
- Ombré Purple and Gray Velvet Delight
- Start by painting your nails with a light gray base color.
- Then, using a makeup sponge, create an ombré effect by dabbing on a rich purple polish from the tips towards the middle of each nail.
- While the purple polish is still wet, gently press flocking powder onto the nails to achieve a velvety gradient effect.
- Finish with a matte topcoat to ensure the velvety texture stands out beautifully.
By following these step-by-step instructions, you can effortlessly achieve these gorgeous velvet nail designs that are perfect for adding a touch of luxury to your holiday look. If you’re interested in more nail art ideas, you can also check out this DIY Nail Art Hacks article for further inspiration.
Conclusion
- Express Your Style with Confidence: Embrace the luxurious and versatile world of velvet nail art this holiday season. Let your nails reflect your unique style and personality with the richness of velvet manicures.
- Unleash Your Creativity: Experiment with different techniques such as semi-metallic polishes, flocking powder, and magnetic polishes to create captivating velvet effects. Explore a spectrum of rich hues and shades to elevate your nail game.
- Make a Statement: Stand out at festive gatherings with stunning velvet nail designs that capture attention and spark conversations. Let your nails become an expression of elegance and sophistication during this joyful season.
As you explore these beautiful velvet nail ideas, remember that there are no limits to creativity. Whether you choose a bold gold velvet manicure inspired by fire or a subtle yet captivating nude velvet look, let your nails be the canvas for your holiday masterpiece. Embrace the beauty of velvet nails and make this holiday season truly unforgettable.