How to DIY the Perfect Manicure at Home

Introduction
A manicure is a beauty treatment that involves caring for and beautifying the nails and hands. It has been a popular beauty routine for many people because it can make you look better and feel more confident. While going to a salon for a manicure is a luxurious treat, you can also get salon-quality results at home if you know how to do it right. By doing your own manicure, you can take care of your nails whenever you want and without having to go anywhere.
With more and more people doing their own beauty treatments at home, learning how to give yourself the perfect manicure has become an empowering goal for many. There’s something incredibly satisfying about having beautifully polished nails that you did yourself. And with the right guidance and tools, you can achieve results that are just as good as what you would get at a salon.
Doing your own manicure not only allows you to express your creativity and style but also saves you money on regular salon visits. With some attention to detail and a commitment to self-care, you can transform your home into your own personal nail spa and enjoy all the relaxing benefits of a professional manicure whenever it suits you.
By seamlessly incorporating the keywords “DIY manicure,” “perfect manicure,” and “at home” into the text, we can make sure that these important topics stand out without interrupting the natural flow of information.
Benefits of Doing Your Own Manicure
Taking the time to pamper your nails with a DIY manicure comes with numerous benefits. Not only does it contribute to your overall well-being, but it also gives you complete control over the products used and helps you save money in the long run.
1. Self-Care and Well-being
Self-care is important for maintaining a healthy mind and body. By dedicating time to do your own manicure, you are prioritizing yourself and indulging in a relaxing activity that can reduce stress and boost your mood. The process of caring for your nails can be therapeutic and provide a sense of accomplishment.
2. Control over Products
When you do your own manicure, you have the freedom to choose the products that best suit your needs. You can opt for high-quality polishes that are free from harmful chemicals like formaldehyde, toluene, and DBP, which are often found in some nail salons. This reduces the risk of potential allergic reactions or exposure to toxins.
3. Money-Saving
Professional salon services can be expensive, especially if you want to maintain perfectly polished nails regularly. By investing in a few essential tools and quality nail products, you can achieve salon-quality results at a fraction of the cost. Over time, DIY manicures prove to be a budget-friendly alternative that doesn’t compromise on quality.
By doing your own manicure, you not only take care of your nails but also promote self-care while having full control over the products used. It’s an empowering experience that allows you to personalize your nail routine according to your preferences and needs. So why not give it a try?
Step-by-Step Guide: Achieving the Perfect Manicure at Home
When it comes to achieving the perfect DIY manicure at home, the first step is crucial in ensuring a flawless and long-lasting result. Let’s dive into the detailed process of preparing your nails for a salon-quality manicure.
Step 1: Prepare Your Nails
Importance of Clean Nails
Before diving into the exciting part of applying nail polish, it’s essential to start with a clean canvas. Clean nails are vital for ensuring better adhesion of the polish and long-lasting results.
Proper Removal of Old Nail Polish
To begin, you’ll need to properly remove any old nail polish. Opt for an acetone-free nail polish remover to maintain the health of your nails. Acetone-free removers are gentler on the nails, preventing them from becoming dry or brittle.
By starting with clean nails and using an acetone-free remover, you’re setting the stage for a flawless DIY manicure that will rival a professional salon treatment.
Step 2: Shape Your Nails
When it comes to achieving the perfect manicure at home, shaping your nails is an important step in the process. This step allows you to create your desired nail shape, whether it’s square, round, oval, or something more unique. Let’s dive into the details of shaping your nails in this step-by-step guide.
Subsection: Clipping
To start shaping your nails, you’ll need a good pair of nail clippers. Opt for a sharp, stainless steel clipper for precision and ease of use. Here are some tips for clipping your nails effectively:
- Choose the right length: Decide on the length you want for your nails and trim them accordingly. Remember to leave a bit of white at the tips for a polished look.
- Avoid cutting too close: Be careful not to cut too close to the nail bed as it can be painful and increase the risk of infection. Leave a small gap between the clipper and your skin.
- Trim straight across: For a classic square shape, trim your nails straight across. This shape works well for those with wide nail beds.
Subsection: Filing
Filing is an essential part of shaping your nails and creating a smooth edge. There are different types of nail files available, such as emery boards and glass files, each with its own benefits. Here’s what you need to know about filing your nails:
- Emery boards: Emery boards are affordable and come in various grit levels (coarseness). Use a coarse-grit file to shape and shorten your nails, then switch to a finer-grit file for smoothing out rough edges.
- Glass files: Glass files are known for their durability and ability to create a precise shape. They have a gentle grit that helps prevent nail damage and splitting.
Remember these filing tips:
- File in one direction: Avoid using a back-and-forth sawing motion, as it can weaken and damage your nails. Instead, file in one direction to maintain the integrity of your nails.
- Smooth the edges: After shaping your nails, carefully round the edges with the file to prevent snags and breaks.
Subsection: Cutting Cuticles
In addition to shaping your nails, it’s also important to pay attention to your cuticles for a well-groomed look. Here’s a comprehensive step-by-step tutorial on cutting cuticles effectively:
- Soften the cuticles: Soak your hands in warm water or use a cuticle softener to make the cuticles easier to work with.
- Push back or trim: Gently push back the cuticles with a cuticle pusher or trim them with a cuticle trimmer, being careful not to go too deep or cause any pain.
- Moisturize: After trimming or pushing back the cuticles, apply a nourishing cuticle oil or cream to keep them hydrated and healthy.
Subsection: Buffing
Buffing your nails is an optional but beneficial step that can help create
Step 3: Prepping the Cuticles and Hands
Caring for the cuticles and surrounding skin is a crucial step in achieving a salon-quality manicure at home. The cuticles play a vital role in protecting the nail bed, and it’s important to handle them with care to maintain healthy nails.
When prepping the cuticles, it’s essential to avoid cutting them, as this can lead to infections and other nail issues. Instead, soften the cuticles by applying cuticle oil and then gently push them back using a cuticle pusher. This process helps to maintain the natural barrier provided by the cuticles while ensuring a neat and tidy nail appearance.
Exfoliating the Hands
Exfoliating your hands is an integral part of the manicure process as it helps remove dead skin cells and promote a smoother texture, providing a perfect canvas for nail polish application. A simple DIY hand scrub can be created using ingredients like sugar and olive oil. Mix these two ingredients to form a gentle scrub, then massage it onto your hands in circular motions before rinsing off with warm water. This natural exfoliant will leave your hands feeling soft and rejuvenated, enhancing the overall manicure experience.
By paying attention to these details and incorporating them into your DIY manicure routine, you can elevate the results and enjoy the benefits of well-prepped nails and nourished hands.
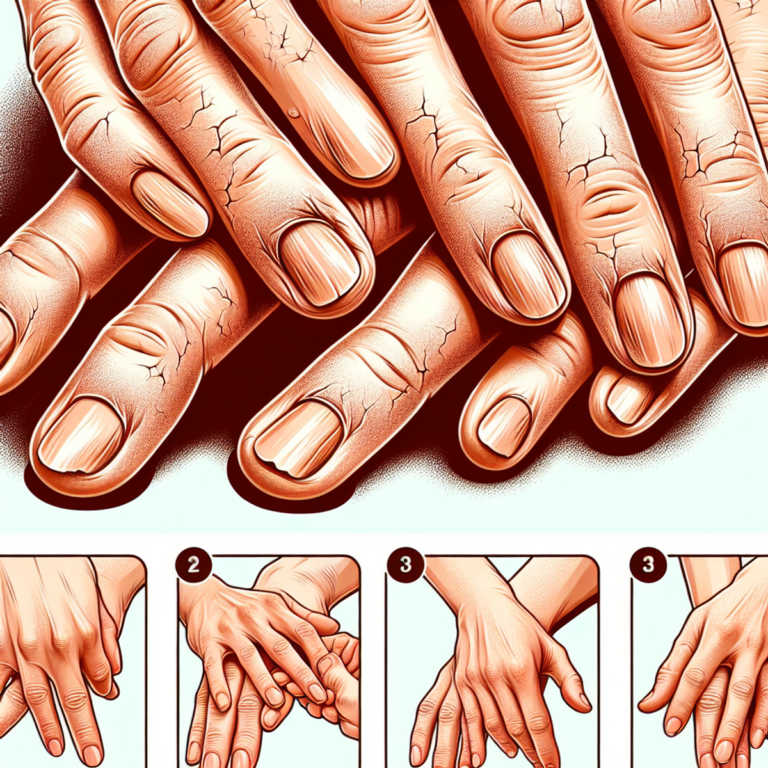
Step 4: Moisturize Your Hands and Nails
Properly moisturizing your hands and nails is an essential step in any DIY manicure routine. Not only does it help to keep your skin hydrated, but it also promotes healthy nail growth and prevents dryness and brittleness.
Here’s how you can effectively moisturize your hands and nails:
- Start by ensuring that your nails are clean and free from any polish residue. You can use a gentle nail polish remover to remove any existing color.
- Once your nails are clean, it’s time to give them some much-needed hydration. Here are two options you can try:
- Nourishing Hand Cream: Choose a hand cream that is specifically formulated to provide deep moisture. Look for ingredients like shea butter, glycerin, or hyaluronic acid, which are known for their hydrating properties. Massage the cream into your hands, focusing on your palms, fingers, and cuticles.
- Argan Oil-Infused Cuticle Serum: Cuticles are prone to dryness and cracking, which can affect the overall health of your nails. Using a cuticle serum that contains nourishing oils like argan oil can help to soften and moisturize this delicate area. Apply a small amount of the serum onto each cuticle and gently massage it in.
- Leave the moisturizer on for a few minutes to allow it to fully absorb into your skin. This will ensure that your hands and nails receive maximum benefits from the hydration.
- If there is any excess product remaining on your nails, you can gently wipe it off using a tissue or cotton pad.
- Repeat this moisturizing step regularly, ideally after every hand wash or whenever you feel that your skin needs an extra boost of hydration.
By incorporating regular hand and cuticle hydration into your beauty routine, you can maintain soft, supple skin and promote strong, healthy nails.
Step 5: Applying the Perfect Nail Polish
Base Coat
A base coat plays a crucial role in safeguarding the nails from staining and ensuring better adhesion of the polish. To apply it effectively, start with a thin layer and cover the entire nail surface smoothly and evenly.
Choosing the Right Nail Color
When selecting a nail color, consider your skin tone and the nature of the occasion. It’s also beneficial to keep up with seasonal trends for inspiration.
Layering the Nail Color
For the first coat of nail color, begin at the base of the nail and stroke towards the tip. Waiting for it to dry before applying a second coat intensifies the hue and ensures complete coverage. If you want to achieve a more professional-looking manicure, you can follow some tips on how to do a manicure like a pro which includes advice on applying multiple coats effectively for a polished look.
Step 6: Seal the Deal with a Topcoat
When it comes to achieving a salon-quality manicure at home, the final step is just as important as the rest of the process. Sealing your freshly painted nails with a topcoat not only adds shine but also helps extend the wear of your DIY manicure. Here’s how to apply the perfect topcoat:
- Choose the Right Topcoat: Selecting a high-quality topcoat is essential for achieving long-lasting results. Look for a fast-drying formula that will save you time and minimize smudging or smearing. Avoid following any misleading advice that could ruin your efforts.
- Apply Evenly: Start by applying a thin layer of topcoat to each nail, starting from the base and gliding towards the tip. Make sure to cover the entire nail surface, including the edges.
- Cap the Edges: To provide extra protection against chipping, cap the edges of each nail by swiping the topcoat over them. This technique creates a barrier that helps seal in your nail color and prevents premature wear.
- Allow Ample Drying Time: After applying the topcoat, allow your nails to dry completely before touching anything or performing any tasks. This will help prevent any accidental smudges or dents that could ruin your hard work. If you’re wondering how long does nail polish stay on for, it can vary depending on factors such as application technique and product quality.
By following these simple steps, you can ensure that your DIY manicure stays flawless for days on end. The topcoat adds an extra layer of shine and protection, giving your nails a professional finish without having to visit a salon.
Remember, practice makes perfect, so don’t be discouraged if you don’t achieve salon-worthy results right away. With time and experience, you’ll become more skilled at creating beautiful manicures in the comfort of your own home. If you’re interested in trying out different nail polish techniques, such as magnetic polish, feel free to explore and experiment with various styles to find what suits you best.
Final Touches: Clean Up and Quick Dry
After you’ve applied the topcoat to seal in your manicure, it’s time for the final touches to ensure a flawless finish. This step involves cleaning up any mistakes or excess polish and allowing your nails to dry completely without smudging. Here’s how you can achieve clean and quick-drying nails:
1. Clean Up Mistakes
To remove any polish mistakes or excess product around the nails, dip a small brush in acetone or use a corrector pen. Gently sweep the brush or pen along the edges of your nails to clean up any smudges or uneven lines. This will give your manicure a polished look.
2. Let Nails Dry
Waiting for your nails to dry completely is crucial to prevent smudging or ruining your hard work. Here are a few tips to speed up the drying process:
- Use a Fan: Set up a fan near your nails and switch it on to the lowest setting. The airflow will help evaporate the nail polish faster, reducing drying time.
- Cold Water Bath: Fill a bowl with cold water and add some ice cubes. After applying the topcoat, dip your fingertips into the cold water for a few minutes. The low temperature will expedite the drying process.
- Quick-Dry Products: Look for quick-dry topcoats or nail polish formulas that are designed to dry faster than traditional ones. These products usually contain ingredients that promote rapid evaporation, allowing you to enjoy beautiful, dry nails in no time.
By following these simple steps, you can ensure that your DIY manicure is clean, precise, and dries quickly without any smudges or imperfections. Take your time during this final stage to achieve salon-quality results at home.
The Finishing Touch: Nourished and Beautiful Nails at Your Fingertips
Taking the time to indulge in a DIY manicure session not only allows you to achieve a salon-quality manicure at home but also provides therapeutic benefits. Here are some final thoughts to keep in mind as you perfect your DIY manicure skills:
- Practice Makes Perfect: Don’t be discouraged if your first attempt is not flawless. Like any skill, achieving the perfect manicure takes practice. With each try, you’ll improve your techniques and develop your own unique style.
- Experiment and Have Fun: DIY manicures give you the freedom to experiment with different nail colors, designs, and techniques. Get creative and let your imagination run wild. Whether you prefer classic shades or bold nail art, there are endless possibilities to express your personal style.
- Regular Maintenance: To maintain beautiful nails between manicures, make sure to moisturize your hands and cuticles regularly. This will help prevent dryness and brittleness, keeping your nails healthy and strong.
Remember, achieving a salon-worthy finish at home is all about attention to detail and taking the time to pamper yourself. So sit back, relax, and enjoy the process of creating nourished and beautiful nails at your fingertips.
Happy DIY manicuring!