How you can Make Clear Skincare Merchandise at House
Introduction
Clean skincare has become increasingly popular as more people prioritize knowing what goes into the products they use on their skin. Using natural ingredients in skincare can have multiple benefits, not only for your skin but also for your overall health and well-being. Creating your own skincare products at home gives you full control over the ingredients, ensuring that you’re using the best and most natural elements to nourish your skin.
There are many reasons why making your own DIY clean beauty products is a great idea:
- Transparency: When you make your own skincare products, you know exactly what’s in them. You can carefully choose each ingredient, avoiding harmful chemicals and additives commonly found in store-bought skincare.
- Avoiding Harmful Ingredients: A lot of commercial skincare products contain synthetic fragrances, parabens, sulfates, and other potentially harmful substances. By making your own skincare, you can skip these additives and instead use pure, natural ingredients that are safer for your skin.
- Customization: DIY skincare lets you create formulas that specifically target your unique needs. Whether you have dry or oily skin, sensitive or acne-prone skin, you can customize recipes to address your specific concerns.
- Self-Care and Sustainability: Making your own skincare products at home is not just about taking care of your skin; it’s also an act of self-care. Spending time creating products that promote self-care can be a therapeutic experience. Additionally, DIY clean beauty aligns with sustainable practices by reducing packaging waste and minimizing the environmental impact associated with store-bought products.
In the following sections, we will explore various homemade clean skincare recipes that will help you take care of your skin naturally and sustainably. Let’s dive into the world of DIY clean beauty!
1. Homemade Rose Water Face Mist
Making your own rose water face mist is a simple and rewarding process that can bring a touch of luxury to your skincare routine. Here’s how you can create a refreshing rose water face mist at home:
Recipe for a Refreshing Rose Water Face Mist
To make your own rose water face mist, you will need the following ingredients:
- Fresh organic rose petals or pure rose essential oil
- Distilled water
- A spray bottle
Highlighting the Hydrating and Soothing Properties of Rose Water
Rose water is known for its hydrating and soothing properties, making it an excellent addition to your skincare regimen. It helps to maintain the skin’s pH balance, control excess oil, and reduce redness and irritation.
Step-by-Step Instructions
- Prepare the Rose Water: If using fresh rose petals, gently rinse them to remove any impurities. Place the petals in a pot and cover them with distilled water. Simmer on low heat until the petals lose their color. Strain the liquid and let it cool.
- Mixing the Rose Water: Once the rose water has cooled, pour it into a clean spray bottle. Add a few drops of pure rose essential oil for a more concentrated scent, if desired.
- Storing and Using: Store your rose water face mist in the refrigerator for a refreshing burst of hydration whenever you need it. Simply spritz it onto your face after cleansing or whenever your skin needs a pick-me-up.
By creating your own rose water face mist, you can harness the natural benefits of roses and treat your skin to a gentle and nurturing experience.
2. Nourishing Body Butter
Body butter is a luxurious skincare product that provides intense hydration and nourishment to the skin. It is especially beneficial during dry seasons when the skin tends to lose moisture. Making your own body butter at home allows you to customize the ingredients and ensure that only natural, clean ingredients are used.
Here is an easy-to-follow recipe for creating a nourishing body butter with natural ingredients:
Ingredients:
- 1 cup shea butter
- 1/2 cup coconut oil
- 1/4 cup almond oil
- 10-15 drops of your favorite essential oil (optional, here’s a guide on using essential oils in skincare)
Instructions:
- In a double boiler or microwave-safe bowl, melt the shea butter and coconut oil until they become liquid.
- Add the almond oil to the melted mixture and stir well to combine.
- Place the mixture in the refrigerator for about 1 hour or until it solidifies but is still soft.
- Using a hand mixer or stand mixer, whip the solidified mixture for about 5 minutes or until it becomes light and fluffy.
- If desired, add your favorite essential oil for a pleasant scent and additional skin benefits. Mix well.
- Transfer the whipped body butter into clean, sterilized jars or containers.
Using this nourishing body butter regularly can provide several benefits for your skin:
- Deep Hydration: The combination of shea butter, coconut oil, and almond oil deeply moisturizes and nourishes the skin, leaving it soft and supple (source).
- Skin Softening: The rich texture of body butter helps soften rough patches on the skin, such as elbows and knees, making them smoother and more touchable.
- Protection against Dryness: Applying body butter after showering helps seal in moisture and prevents dryness throughout the day.
- Natural Ingredients: By making your own body butter, you have complete control over the ingredients used, ensuring that only natural and clean ingredients come into contact with your skin (here’s an easy homemade body butter recipe you can try).
Remember to store your homemade body butter in a cool, dry place to prevent melting. Apply a small amount of the body butter onto your skin and massage gently until absorbed. Enjoy the luxurious feel and nourishing benefits of this homemade body butter!
3. Exfoliating Lip Scrub
When it comes to achieving smooth and healthy lips, exfoliation is key. An exfoliating lip scrub helps remove dead skin cells and improves the texture of your lips, leaving them soft and supple. Here’s why you should consider adding a homemade lip scrub to your skincare routine:
Benefits of Exfoliating Lip Scrub
Regular exfoliation of the lips helps in removing dead skin cells, which can accumulate and cause dry, flaky, or chapped lips. By sloughing off these dead cells, a lip scrub promotes smoother and healthier-looking lips.
Homemade Lip Scrub Recipe
Creating your own lip scrub at home is simple and cost-effective. You can customize the ingredients to suit your preferences and ensure that you are using natural, non-toxic components. A basic DIY lip scrub may include natural exfoliants like sugar or salt, combined with nourishing oils such as coconut oil or almond oil, along with a touch of essential oils for fragrance.
Here’s a simple yet effective recipe for making a homemade lip scrub:
DIY Exfoliating Lip Scrub
Ingredients:
- 1 tablespoon of granulated sugar
- 1/2 tablespoon of coconut oil
- 3-4 drops of essential oil (e.g., lavender, peppermint)
Instructions:
- In a small bowl, mix the granulated sugar and coconut oil until well combined.
- Add a few drops of your preferred essential oil and stir the mixture thoroughly.
- Gently massage a small amount of the lip scrub onto your lips in circular motions for about one minute.
- Rinse off the scrub with warm water and pat your lips dry.
By incorporating this easy-to-make exfoliating lip scrub into your skincare regimen once or twice a week, you can maintain smooth, flake-free lips year-round.
4. Gentle Makeup Remover Wipes
When it comes to removing makeup, especially around the delicate eye area, it’s important to use a gentle and non-irritating formula. Commercial makeup remover wipes often contain harsh chemicals and synthetic fragrances that can strip the skin of its natural oils and cause irritation. That’s why making your own natural makeup remover wipes is a great alternative. Here’s a simple recipe to create your own gentle makeup remover wipes:
What you’ll need:
- 1 cup distilled water
- 1 tablespoon witch hazel
- 1 tablespoon almond oil
- 10 drops lavender essential oil
- 10 drops chamomile essential oil
- A roll of paper towels
- Airtight container
Instructions:
- Start by cutting the paper towel roll in half using a sharp knife.
- In a bowl, mix together the distilled water, witch hazel, almond oil, lavender essential oil, and chamomile essential oil.
- Place one of the paper towel halves in the container and pour the liquid mixture over it.
- Allow the mixture to soak into the paper towels for a few minutes until they are fully saturated.
- Once saturated, carefully remove the cardboard tube from the center of the paper towel roll.
- Pull out the wipes from the center and use as needed.
- After each use, make sure to seal the container tightly to prevent the wipes from drying out.
These DIY makeup remover wipes effectively cleanse the skin without causing any irritation or dryness. The combination of witch hazel and almond oil helps to remove makeup while also soothing and hydrating the skin. Lavender and chamomile essential oils provide additional calming benefits.
Not only are these homemade makeup remover wipes better for your skin, but they are also more sustainable than their disposable counterparts. By reusing an airtight container and making your own wipes, you reduce waste and contribute to a more eco-friendly beauty routine.
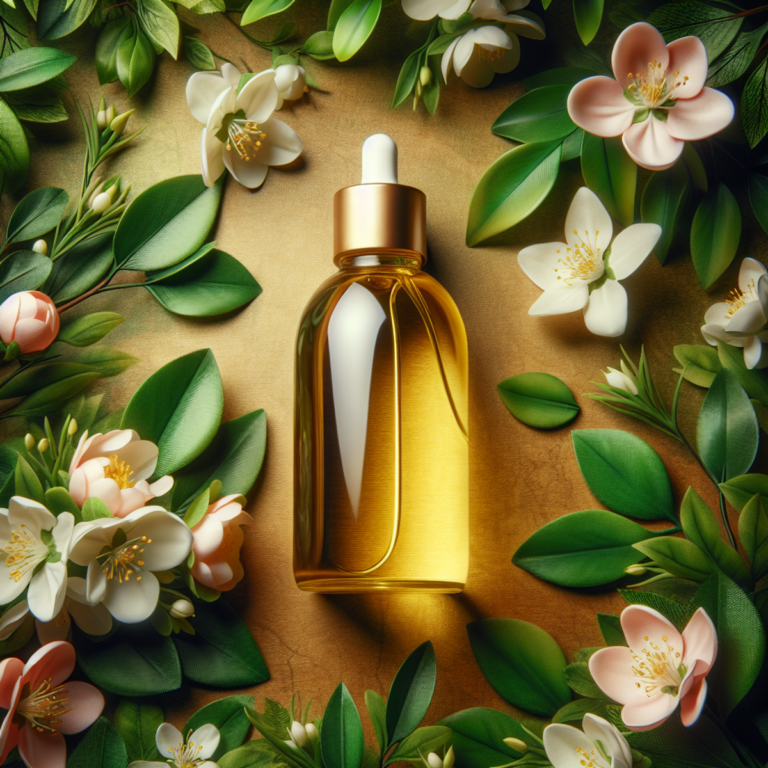
5. Nourishing Face Oil
When it comes to skincare, nourishing face oils are a popular choice for many people seeking hydration and improved skin elasticity. Making your own nourishing face oil at home allows you to customize the formula to suit your specific skin type and concerns.
Benefits of Nourishing Face Oil
Incorporating a nourishing face oil into your skincare routine can provide multiple benefits, such as:
- Hydration: Face oils can help in moisturizing and nourishing the skin, especially for dry or dehydrated skin.
- Improved Skin Elasticity: Certain natural oils contain antioxidants and essential fatty acids that can aid in improving the elasticity and firmness of the skin.
- Customizable Formulation: Creating your own face oil allows you to tailor the ingredients based on your unique skin needs, whether it’s addressing dryness, dullness, or fine lines.
DIY Recipe for Nourishing Face Oil
Here’s a simple recipe for creating your own customizable nourishing face oil:
- Base Oil: Start with a carrier oil such as jojoba oil, sweet almond oil, or rosehip seed oil as the base.
- Essential Oils: Add a few drops of essential oils like lavender, chamomile, or frankincense for added benefits and a pleasant aroma.
- Antioxidant Booster: Consider including a small amount of vitamin E oil or pomegranate seed oil for their antioxidant properties.
Customization Tip: Adjust the proportions based on your skin type – for example, using lighter oils for oily skin and richer oils for dry skin.
Creating your own nourishing face oil not only gives you control over the ingredients but also allows you to experiment with different combinations until you find the perfect blend for your skin.
6. Hydrating Bath Salts
Bath salts are a wonderful addition to any self-care routine. They not only enhance relaxation but also promote detoxification of the body. By creating your own aromatic bath salts at home, you can enjoy a spa-like experience and customize the scent to suit your preferences.
Recipe for Hydrating Bath Salts
Ingredients:
- 1 cup Epsom salt – known for its numerous health benefits
- ½ cup sea salt
- ¼ cup baking soda
- 10-15 drops of essential oil (such as lavender, chamomile, or eucalyptus)
- Dried herbs or flower petals (optional)
Instructions:
- In a mixing bowl, combine the Epsom salt, sea salt, and baking soda.
- Add the essential oil drops to the mixture and stir well to distribute the scent evenly.
- If desired, add dried herbs or flower petals for extra visual appeal and fragrance.
- Transfer the bath salts into a clean, airtight container for storage.
- To use, simply add a handful of the bath salts to warm running water and allow them to dissolve completely before stepping into the bath.
The Benefits of Bath Salts
Bath salts offer numerous benefits beyond relaxation. Here’s why you should consider incorporating them into your self-care routine:
- Enhanced Relaxation: The warm water combined with the aromatic scent of bath salts creates a soothing environment that helps relieve stress and tension.
- Detoxification: Bath salts can help draw out toxins from your body through a process called reverse osmosis. As you soak in the salt-infused water, impurities are pulled out through your skin pores.
- Muscle Relief: Epsom salt, a key ingredient in bath salts, contains magnesium sulfate which has been shown to soothe sore muscles and reduce inflammation. This makes bath salts an excellent choice after a strenuous workout or a long, tiring day.
- Improved Sleep: The calming effects of bath salts can also promote better sleep. Taking a bath with bath salts before bed can help relax your body and mind, making it easier for you to fall asleep and enjoy a restful night.
Customize Your Bath Salts
One of the best things about making your own bath salts is the ability to customize them according to your preferences. You can experiment with different essential oil combinations to create unique scents that suit your mood or address specific concerns. Here are a few ideas:
- Relaxation Blend: Combine lavender and chamomile essential oils for a calming and stress-relieving experience.
- Energizing Blend: Mix eucalyptus and peppermint essential oils to invigorate your senses and awaken your mind.
- Soothing Blend: Try combining ylang-ylang and bergamot essential oils for a soothing and uplifting effect on both the body and mind.
Remember to store your homemade bath salts in a cool, dry place to maintain their freshness. Enjoy the luxurious experience of soaking in your own customized
7. DIY Body Oil for Deep Moisturization
Body oils are an essential part of any skincare routine, providing deep moisturization and a healthy glow to the skin. By using luxurious oils and botanicals, you can create a custom body oil tailored to your skin’s specific needs.
- The hydrating and nourishing properties of body oils make them an excellent choice for deep moisturization and skin rejuvenation.
- Body oils have the ability to impart a healthy, radiant glow to the skin, leaving it looking and feeling replenished.
DIY Recipe
Here’s a simple yet effective recipe for creating your own DIY body oil:
Ingredients:
- 1/2 cup of jojoba oil
- 1/4 cup of sweet almond oil
- 1/4 cup of apricot kernel oil
- 5-10 drops of your preferred essential oil (such as lavender, rose, or chamomile)
Instructions:
- In a clean glass bottle, combine the jojoba oil, sweet almond oil, and apricot kernel oil.
- Add 5-10 drops of your chosen essential oil to the blend. Essential oils not only add fragrance but also provide additional skincare benefits.
- Close the bottle tightly and shake well to ensure all the oils are thoroughly mixed.
- Your DIY body oil is now ready to use. Apply a small amount to your skin after a bath or shower for maximum absorption and hydration.
Creating your own body oil allows you to customize the scent and properties according to your preferences, making it a personalized addition to your skincare regimen.
8. Nurturing Cuticle Oil Blend
Cuticle oil is an essential part of nail care, as it helps keep the cuticles healthy and conditioned, promoting overall nail health and appearance. Regular application of cuticle oil can prevent dry, cracked cuticles and improve the strength and flexibility of your nails. Here’s an easy DIY cuticle oil recipe that you can apply regularly to maintain healthy and nourished cuticles:
DIY Cuticle Oil Recipe
Ingredients:
- 1 tablespoon almond oil
- 1 tablespoon jojoba oil
- 4 drops vitamin E oil
- 2 drops lavender essential oil
- 2 drops tea tree essential oil
Instructions:
- Combine the almond oil, jojoba oil, and vitamin E oil in a small glass bottle with a dropper.
- Add the lavender essential oil and tea tree essential oil to the mixture.
- Close the bottle tightly and shake well to ensure all the oils are thoroughly combined.
Application:
- Gently massage a small amount of the cuticle oil blend into your cuticles and nails.
- Use daily for best results, especially before bedtime to allow the oils to penetrate and nourish the cuticles overnight.
Taking care of your cuticles with this nurturing DIY cuticle oil blend not only keeps them looking healthy but also contributes to stronger, more resilient nails. Incorporating this simple yet effective step into your regular nail care routine can make a noticeable difference in the overall appearance and health of your nails.
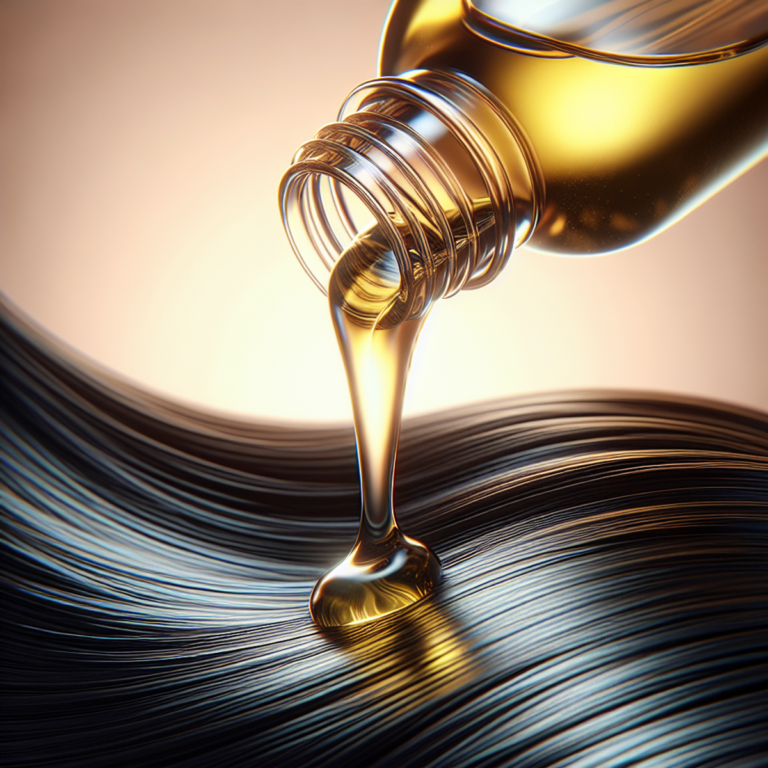
9. Repairing Hair Mask Treatment
Whether your hair is feeling dry, damaged, or in need of some extra care, a homemade repairing hair mask treatment can work wonders. By utilizing natural ingredients, you can nourish and strengthen your hair while avoiding the harsh chemicals found in many commercial products.
Recipe for Nourishing Hair Mask
Here’s a simple yet effective recipe for a repairing hair mask treatment using ingredients like avocado, coconut oil, and honey. These natural elements are known for their moisturizing and revitalizing properties, making them ideal for restoring health to damaged or dry hair.
- Ingredients:
- 1 ripe avocado
- 2 tablespoons coconut oil
- 1 tablespoon honey
- Instructions:
- Mash the avocado in a bowl until smooth.
- Add the coconut oil and honey to the mashed avocado and mix well.
- Apply the mixture to damp hair, focusing on the ends.
- Leave it on for 30 minutes.
- Rinse thoroughly with lukewarm water.
- Shampoo and condition as usual.
Benefits of Homemade Hair Masks
Homemade hair masks offer several advantages over store-bought alternatives:
- Nourishment: The natural ingredients used in homemade hair masks are packed with essential nutrients that can deeply nourish your hair.
- Repair: These ingredients have reparative properties that can help restore damaged hair strands.
- Moisture: Homemade hair masks are excellent at providing hydration to dry and brittle hair.
- Cost-effective: Making your own hair mask at home is often more affordable than purchasing one from a store.
Reviving and Conditioning
This DIY hair mask helps revive and condition the hair, leaving it feeling softer, smoother, and more manageable. Here’s how each ingredient contributes to the overall health of your hair:
- Avocado: Rich in healthy fats, vitamins, and minerals, avocado deeply moisturizes the hair, enhances shine, and improves manageability.
- Coconut Oil: Known for its ability to penetrate the hair shaft, coconut oil helps reduce protein loss, strengthen the hair from within, and prevent breakage.
- Honey: A natural humectant, honey attracts and retains moisture in the hair, making it an excellent ingredient for combating dryness and frizz.
By focusing on the restorative properties of the ingredients used, readers can understand the transformative effects of this treatment on their hair.
“I love using this homemade hair mask! It’s made such a difference in my hair texture and appearance. My strands feel stronger and look so much healthier.” – Sarah, a satisfied user of the repairing hair mask treatment.
By crafting your own repairing hair mask treatment at home, you have full control over what goes into it, ensuring that you’re using only the best natural ingredients for your hair’s specific needs. Plus, it’s a budget-friendly alternative to expensive salon treatments, allowing you to indulge in some self-care without breaking the bank.
Encourage Exploration, Share Experiences, and Embrace Individuality
The DIY clean skincare recipes provided in this article offer a wonderful opportunity for you to embark on a journey of self-care and sustainability. As you delve into the world of creating your own skincare products, I encourage you to not only experiment with the recipes but also share your experiences and feedback with the community.
- Try out the DIY recipes and share your feedback: I invite you to give these homemade skincare recipes a try and let us know how they worked for you. Your input can help others decide which recipes to try and what modifications they might need.
- Celebrate diverse skin experiences: Each person’s skin is unique, so it’s fascinating to hear about different experiences with homemade skincare products. Whether a recipe worked wonders for you or didn’t quite meet your expectations, sharing your story can spark insightful conversations and empower others to embrace their individuality.
- Customize the recipes to suit your needs: Feel free to experiment with the ingredients and proportions mentioned in the recipes. Our skin has varying requirements, and what works for one person may not work for another. By making adjustments according to your preferences and needs, you can create personalized skincare solutions that cater specifically to your skin type.
In addition to exploring these DIY skincare options, it might also be worth considering other factors that contribute to our overall appearance. For instance, if you’ve been struggling with under-eye circles, understanding their genetic origins could help inform potential remedies.
Remember, your experiences are valuable not only for personal growth but also for others who may be seeking inspiration and guidance. Embrace the process of exploration and discovery as you engage in the art of crafting clean skincare products at home.
Embrace Clean Beauty with DIY Skincare
Creating your own clean skincare products at home not only allows you to tailor the formulations to your unique skin needs but also promotes skin health. By using natural ingredients, you can minimize the exposure to potentially harmful chemicals found in commercial products, thus reducing the risk of skin irritation and allergic reactions. Additionally, embracing DIY skincare contributes to sustainability efforts by reducing packaging waste and the carbon footprint associated with the production and transportation of store-bought beauty products.
As you delve into the world of DIY beauty, you’re not only taking control of what goes onto your skin but also participating in a movement towards eco-friendly and sustainable practices. Embracing clean beauty through homemade skincare empowers you to make conscious choices that benefit both your skin and the environment. So go ahead, explore the recipes, experiment with different ingredients, and embark on a journey towards healthier, more sustainable skincare practices that align with your values.
Remember, the power of clean beauty is in your hands – quite literally!