Beauty Q&A: What Are Polygel Nail Extensions?

Introduction
Polygel nail extensions have become increasingly popular in the world of beauty. If you’re curious about what they are and how they work, you’ve come to the right place. In this beauty Q&A, we’ll explore everything you need to know about Polygel nail extensions.
Polygel nails are a revolutionary hybrid between traditional gel and acrylic nails. They offer a durable and flexible alternative that combines the best features of both. The Polygel formula is a unique blend of acrylic powder and clear gel, resulting in a putty-like consistency that is easy to work with.
The purpose of this article is to provide you with a comprehensive understanding of Polygel nail extensions. We’ll cover topics such as:
- What are Polygel nail extensions?
- How are they applied?
- How long do they last?
- Are they safe for natural nails?
- How much do they cost?
By the end of this Q&A, you’ll have all the information you need to decide if Polygel nails are right for you.
1. What Are Polygel Nail Extensions?
Polygel nails, also known as hybrid nails, are a popular nail enhancement option that combines the best qualities of gel and acrylic nails. The Polygel formula offers a durable and flexible alternative to traditional acrylics, providing a lightweight and odorless option for nail extensions.
Definition and Description of Polygel Nails
Polygel nails are created using a unique formula that blends the durability of acrylics with the flexibility and natural look of gel nails. This innovative hybrid material is typically sold in a tube and consists of a mixture of acrylic powder and clear gel. When applied, Polygel has a putty-like consistency, allowing for easy shaping and sculpting to achieve the desired nail extension.
Comparison to Gel and Acrylic Nails
In contrast to traditional gel nails, which require curing under UV light, Polygel nails are cured using an LED light. This method offers quicker curing times and reduces the risk of skin damage from UV exposure. Additionally, Polygel nails are more lightweight and flexible compared to acrylics, providing a comfortable and natural feel.
Benefits of Polygel Nails
- Lightweight and flexible nature for enhanced comfort
- Odorless application process
- Durable and long-lasting results
- Natural look and feel similar to gel nails
Polygel nails have gained popularity due to their ability to deliver the strength of acrylics without the heavy, artificial appearance. This innovative nail enhancement option provides a versatile solution for individuals seeking durable, yet natural-looking nail extensions.
2. How Are Polygel Nail Extensions Applied?
Polygel nail extensions offer a convenient and versatile solution for achieving long, strong, and beautiful nails. The application process requires a few steps to ensure a flawless result. Let’s dive into the details of how Polygel nails are applied:
- Preparation: Start by prepping your natural nails. Remove any existing polish and gently push back your cuticles to create a clean canvas for the Polygel application.
- Nail Shaping: Shape your nails using a file to achieve the desired length and shape. You can choose from various styles such as square, round, almond, or stiletto.
- Dehydration: Apply a dehydrator or nail primer to remove any oils or moisture from the surface of your nails. This step helps improve adhesion and ensures longevity.
- Application: Squeeze a small amount of Polygel from the tube onto a nail form or nail tip. The putty-like consistency of Polygel allows for easy sculpting and shaping. Use a brush or spatula dipped in alcohol to prevent sticking and shape the Polygel onto your natural nail or nail form.
- Smooth and Sculpt: Dip your brush into isopropyl alcohol and lightly pat the surface of the Polygel to smooth it out and remove any imperfections. Sculpt the Polygel into your desired nail shape using gentle pressure with your brush or tool.
- LED Light Curing: Place your hand under an LED lamp to cure the Polygel. Follow the manufacturer’s instructions for recommended curing times, usually ranging from 30 to 60 seconds per layer.
- Repeat Layers: Apply additional layers of Polygel if necessary to achieve the desired thickness and strength. Remember to cure each layer under the LED lamp before proceeding.
- Shaping and Buffing: Once all layers are cured, gently remove the nail forms or tips. Use a file to shape and refine the edges of your nails. Buff the surface of the Polygel to create a smooth and even finish.
- Finishing Touches: Wipe away any dust from filing and buffing using a lint-free wipe or brush. Apply a gel top coat to add shine and protect your Polygel nails. Cure the top coat under the LED lamp for the recommended time.
By following these steps, you can achieve professional-looking Polygel nail extensions in the comfort of your own home. The putty-like consistency of Polygel allows for easy application and shaping, while the LED light curing ensures a durable and long-lasting result.
Remember, practice makes perfect! It might take a few attempts to master the technique, but with time and patience, you’ll be able to create stunning Polygel nail extensions that last for weeks.
Pro Tips:
- If you’ve been experiencing issues like short-lasting gel nails, you may find helpful insights on this Reddit thread.
- For achieving near-professional results when painting your nails, you can explore some valuable suggestions shared in [this Reddit discussion](https://www.reddit.com/r/beauty/comments/12aw
3. How Long Do Polygel Nail Extensions Last?
Polygel nail extensions are a great choice if you want nails that look amazing and stay strong for a long time. On average, you can expect your Polygel nails to last around three to four weeks before they need some touch-ups. However, there are a few things that can affect how long they actually last:
- Nail growth: As your natural nails grow, you’ll start to see a gap between the cuticle and the Polygel extension. This is normal, but it does mean that you might need to get fill-ins more often to keep your nails looking seamless.
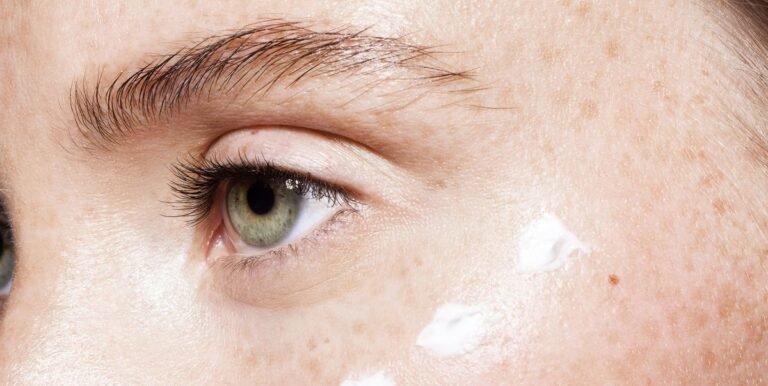
- Taking care of your nails: The way you treat your Polygel nails has a big impact on how long they stay in good shape. Following a proper nail care routine is key to making them last longer. This means moisturizing your cuticles every day, avoiding too much contact with water or harsh chemicals, and wearing gloves when you’re doing anything that could harm your nails.
- Getting your nails ready: How well the Polygel extensions stick to your natural nails depends on how they’re prepared. Your nail technician should gently buff the surface of your nails so that the Polygel has something to hold onto. They might also use rubbing alcohol or a nail dehydrator to remove any oils from your nails, which can help with adhesion.
- Keeping up with maintenance: Regular appointments for fill-ins are important if you want to keep wearing Polygel nails. Most people find that getting a fill-in every two to three weeks works well because it allows enough time for their natural nails to grow without causing too many gaps or lifting.
Tips for Making Your Polygel Nail Extensions Last Longer
Here are some things you can do to help extend the lifespan of your Polygel nail extensions:
- Protect your nails: Whenever you’re doing chores around the house or any activities that could expose your nails to water or chemicals, it’s a good idea to wear gloves. This extra layer of protection can go a long way in preventing damage.
- Avoid picking or biting: It can be tempting to pick at or bite your nail extensions when they start to lift or break, but try your best to resist. Doing this can cause even more damage and make them come off sooner.
- Moisturize your cuticles: Keeping your cuticles hydrated is an important part of overall nail health. Applying cuticle oil every day, like the one mentioned in this ultimate guide to cuticle care, can help prevent dryness and keep your nails looking their best.
- Treat your nails gently: While Polygel nails are quite strong, they’re not indestructible. Using them as tools for opening cans or other tasks that require a lot of force can lead to breakage or damage.
By following these tips and taking good care of your Polygel nails, you’ll be able to enjoy beautiful-looking extensions for longer periods of time. Just
4. Are Polygel Nail Extensions Safe for Natural Nails?
Polygel nail extensions have gained popularity in recent years due to their durability and flexibility. However, many people wonder if they are safe for natural nails. Let’s delve into the safety aspects of Polygel nails and explore proper application and removal techniques to minimize any potential damage.
Discussion on the Safety Aspects of Polygel Nails
When applied and removed properly, Polygel nails can be a safe option for natural nails. Here are some key points to consider:
- Chemical Composition: Polygel is a combination of acrylic powder and clear gel, which creates a putty-like consistency. Unlike traditional acrylic nails, Polygel does not emit strong odors or contain harsh chemicals that can damage the natural nails.
- Lightweight and Flexible: One of the advantages of Polygel is its lightweight and flexible nature. It feels comfortable on the nails and allows for natural movement without causing excessive pressure or strain.
- Minimized Damage: Compared to acrylic nails, Polygel tends to be gentler on the natural nails during both application and removal processes. The putty-like consistency makes it easier to sculpt without excessive filing or buffing, reducing the risk of thinning or weakening the nail plate.
Proper Application and Removal Techniques
To ensure the safety of your natural nails when getting Polygel extensions, it is crucial to follow proper application and removal techniques. Here are some guidelines:
- Choose a Professional Technician: It is highly recommended to visit a licensed nail technician who specializes in Polygel applications. They will have the expertise to apply the product correctly, ensuring minimal damage to your natural nails.
- Preparation: Before applying Polygel, your technician should properly prep your natural nails by gently pushing back the cuticles and removing any oils or residue from the nail surface.
- Proper Curing: Polygel requires curing under an LED light to harden and set. It is important to follow the recommended curing time to ensure the product fully cures, providing maximum strength and longevity.
- Regular Maintenance: To maintain the health of your natural nails, it is essential to schedule regular fill-in appointments. This will prevent the extensions from becoming too long or heavy, which can put unnecessary stress on your natural nails.
- Professional Removal: When it comes time to remove your Polygel extensions, it is crucial to have them professionally removed by a trained technician. They will use safe techniques and products to dissolve the Polygel without causing damage or trauma to your natural nails.
By following these guidelines and seeking professional assistance, you can enjoy the benefits of Polygel nail extensions while keeping your natural nails safe and healthy.
5. How Much Do Polygel Nail Extensions Cost?
Polygel nail extensions are a popular choice for those looking for a long-lasting and flexible alternative to traditional acrylics. But how much do they actually cost? Let’s break it down.
Range of Costs for Different Types of Applications
The cost of Polygel nail extensions can vary depending on the type of application. Here are the typical price ranges for different types:
- Full Set or Sculpted Extension: This involves creating new nail extensions from scratch. It takes more time and effort, so it tends to be pricier. On average, a full set or sculpted extension can cost between $55 and $150.
- Fill-In: This is when you refresh and maintain your existing Polygel extensions by filling in the regrowth area near the cuticle. Since it requires less time and material compared to a full set, the cost is generally lower. Fill-ins typically range from $30 to $80.
Factors that Influence Pricing
Several factors can affect the price of Polygel nail extensions. Here’s what you need to know:
- Location: The salon’s location plays a big role in pricing. Salons in upscale areas or major cities may have higher prices due to higher overhead costs.
- Reputation: Well-known salons with a good reputation may charge more because of their expertise and demand.
- Technician Experience: Experienced nail technicians who are skilled at applying Polygel nails may charge higher prices for their services.
- Design Complexity: Intricate designs like nail art or custom shapes may increase the overall cost as they require more time and skill.
- Additional Services: Some salons offer extra services with Polygel extensions such as cuticle care, hand massages, or nail art. These can add to the total cost.
- Product Quality: The quality of the Polygel product used can also impact the price. Higher-quality products may cost more but can offer better results and durability.
It’s important to note that the prices mentioned here are just estimates and can vary depending on where you live and the specific salon you go to. To get accurate pricing information, it’s best to consult with your local salon or nail technician.
By understanding the different types of applications, the factors that affect pricing, and the average price ranges, you’ll be better equipped to make a decision about getting Polygel nail extensions. Remember, investing in high-quality services from experienced professionals can ensure beautiful and long-lasting results for your nails.
If you’re a nail technician looking to maximize your income, there are also several ways you can increase your earnings through various strategies such as offering additional services or upselling products to clients.
Conclusion
Polygel nail extensions offer a fantastic alternative to traditional acrylics and gel nails. With their unique combination of durability and flexibility, Polygel nails provide a lightweight and odorless option for those looking to enhance their natural nails.
If you haven’t tried Polygel nails yet, I highly encourage you to give them a go. Here’s why:
- Long-lasting: With proper application and care, Polygel nails can last up to three to four weeks, making them a great choice for those who want their manicure to stay intact for an extended period.
- Safe for natural nails: When applied and removed correctly, Polygel nails are considered safe for your natural nails. It’s essential to follow the proper techniques to minimize any potential damage.
- Versatile and customizable: Whether you prefer a classic French manicure, trendy ombré designs, or intricate nail art, Polygel nails can be shaped and sculpted into various styles to suit your preferences.
- Comfortable and lightweight: Unlike traditional acrylics, Polygel nails are lightweight and don’t feel heavy or bulky on your natural nails. You’ll enjoy the comfortable wear without compromising on durability.
To explore further, consider visiting a professional nail technician who specializes in Polygel nails. They can guide you through the process, recommend suitable designs, and provide helpful tips for maintenance.
So why not treat yourself to a set of beautiful Polygel nail extensions? Experience the best of both worlds with the durability of acrylics and the flexibility of gels. Enhance your natural nails with this innovative nail enhancement technique today!
Remember to take proper care of your Polygel nails by moisturizing regularly, avoiding harsh chemicals, and scheduling regular touch-ups as needed. Enjoy your stunning new manicure!